


As an experienced statistical programmer, I regularly use R for data analysis and reporting in my work. R is a popular programming language among data analysts and statisticians across the world. One of the features that distinguish R from many other programming languages is its impressive graphics package called ggplot2, which helps you create data visualizations.
Recently, I explored how R and ggplot2 can be used in n8n: I built a workflow that automatically generates plots with ggplot2 and sends them in a Telegram chat. In this tutorial, I'll walk you through my workflow and show you how it's possible to run R scripts in n8n.
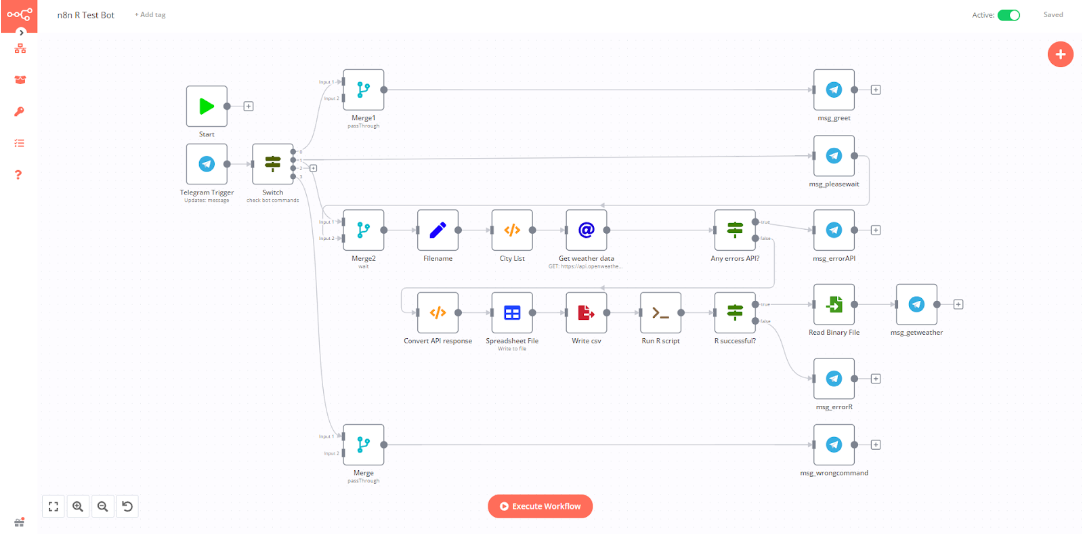
Table of contents
The use case
Prerequisites
Building the workflow
What’s next?
The use case
I wanted to combine my experience in R with my interest in low-code tools like n8n to automatically generate data visualizations. For testing, I decided to create a workflow that automatically fetches weather information of different cities from the OpenWeather API, generates a plot in R illustrating the data, and sends this plot as an image with a Telegram bot.
This workflow demonstrates how n8n can remove many hurdles of data analysts who use R in their daily work, but are not familiar with server configuration, API calls, or Telegram bots.
Prerequisites
Before building the n8n workflow, make sure you meet the following prerequisites set up:
- n8n in Docker: We will extend the Docker version of n8n and use Execute Command node to run an R script.
- A Telegram bot. If you have never created Telegram bots before, here is a tutorial for that.
- An API key from OpenWeather. The free tier is enough for this tutorial. Note that it might take a couple of hours before your API key is activated.
- R. Don’t worry if you are not familiar with the it, I will explain the installation process and provide a code example.
- Basic JavaScript knowledge. It would be helpful to understand what the provided code snippets do.
Building the workflow
Before building the workflow, we need to install the R language along with n8n.
Installing n8n with R
n8n can be installed as a Docker image. let’s take a look at the docker-compose.yml file first:
  n8n:
    build:
      context: .
      dockerfile: Dockerfile-n8n
      args:
        tag: latest
    restart: always
    environment:
      - NODE_ENV=production
      - DB_SQLITE_VACUUM_ON_STARTUP=true
      - N8N_USER_MANAGEMENT_DISABLED=true
      - N8N_BASIC_AUTH_ACTIVE=true
      - N8N_BASIC_AUTH_USER
      - N8N_BASIC_AUTH_PASSWORD
      - N8N_HOST
      - N8N_PROTOCOL
      - N8N_PORT
      - GENERIC_TIMEZONE
      - VUE_APP_URL_BASE_API=${N8N_PROTOCOL}://${N8N_HOST}/
      - WEBHOOK_TUNNEL_URL=${N8N_PROTOCOL}://${N8N_HOST}/
      - WEBHOOK_URL=${N8N_PROTOCOL}://${N8N_HOST}/
    volumes:
      - './.n8n:/home/node/.n8n'
      - './n8n-local-files:/files'
Here we are defining a single-user n8n instance with a default SQLite database and some additional environmental variables that are stored in the .env file in the same directory as docker-compose.yml. There is also a custom dockerfile for n8n, which installs necessary R packages:
ARG tag=latest
FROM n8nio/n8n:$tag

# install several Linux packages
RUN apk --update add curl curl-dev libcurl linux-headers g++ gfortran libxml2 libxml2-dev R R-dev

# install a custom package manager
RUN R -e "install.packages('pak', repos = 'http://cran.us.r-project.org')"

#install several packages for this tutorial
RUN R -e "pak::pkg_install(c('ggplot2','ggthemes','dplyr','magrittr', 'tidyr', 'lubridate'))"
After these configuration files are ready, we need to run several commands on the server:
sudo docker-compose build --no-cache n8n
sudo docker-compose stop
sudo docker-compose up -d
Configuring the workflow nodes
Once you have extended the n8n Docker image and obtained the API key, it's time to create the workflow!
First, we place a Telegram trigger Node to catch the incoming messages. Then, we use a Switch Node to filter the incoming text from the {{$json["message"]["text"]}} variable. In this bot we will process only three cases: /start command will trigger a welcome text, /getweather will do the main functionality and everything else is considered as an invalid command.
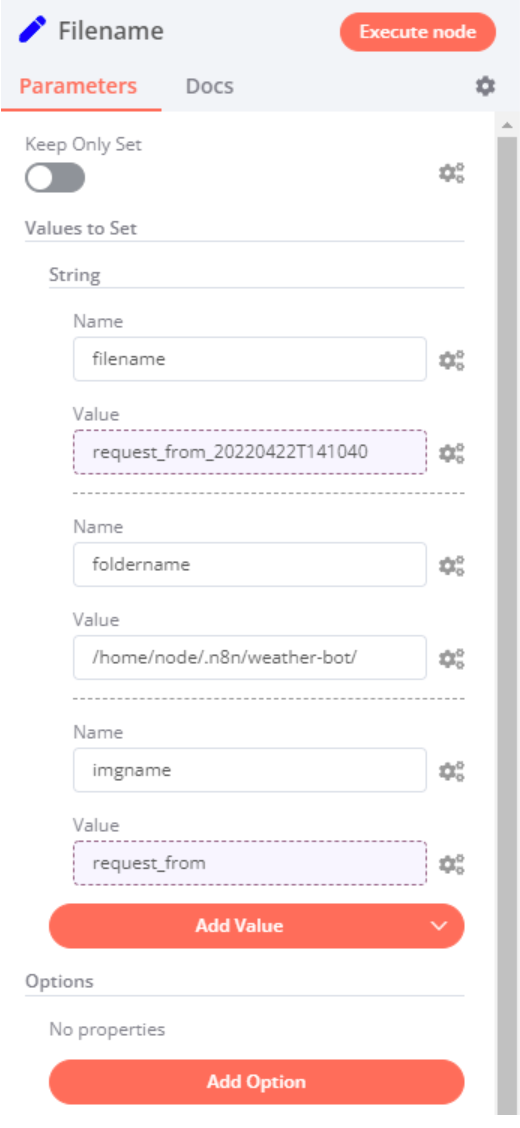
After the /getweather command is submitted we will first set up a few variables using the Set Node.
- filename is an expression which concatenates Telegram ID and a timestamp, and will be used to save the csv file and log.
- Foldername depends on your VPS setup.
- Imgname is the filename of the outcome image. It only defines a Telegram user ID, because we don’t want to store all the images that were sent to the user.
Next, a Function Node contains a list of European capital cities:
return [{Cityid: 2643743, Cityname:"London",    Country: "GB"},
{Cityid: 2950159, Cityname:"Berlin",    Country: "DE"},
{Cityid: 3117735, Cityname:"Madrid",    Country: "ES"},
{Cityid: 3169070, Cityname:"Rome",      Country: "IT"},
{Cityid: 683506,  Cityname:"Bucharest", Country: "RO"},
{Cityid: 2968815, Cityname:"Paris",     Country: "FR"},
{Cityid: 2761369, Cityname:"Vienna",    Country: "AT"},
{Cityid: 756135,  Cityname:"Warsaw",    Country: "PL"},
{Cityid: 3054638, Cityname:"Budapest",  Country: "HU"},
{Cityid: 792680,  Cityname:"Belgrade",  Country: "RS"}];
The Cityid is taken from the OpenWeather documentation. You can create your own list of cities.
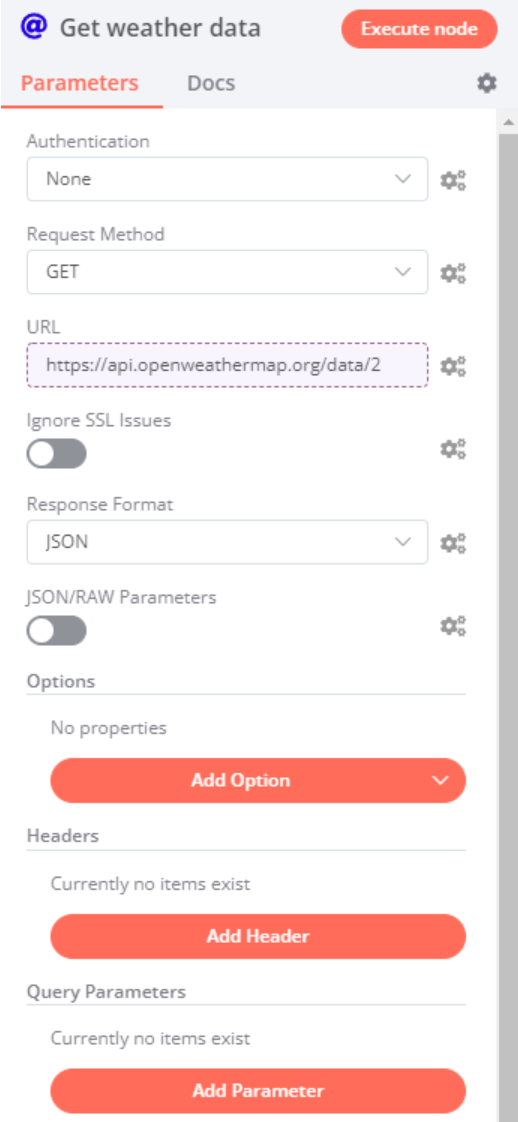
Now, we are ready to fetch the weather data!
Since n8n does not have a special Node for the OpenWeather service, we use the HTTP Request Node.
This call will trigger ten API requests (because we have configured ten cities) and the result will look like this:
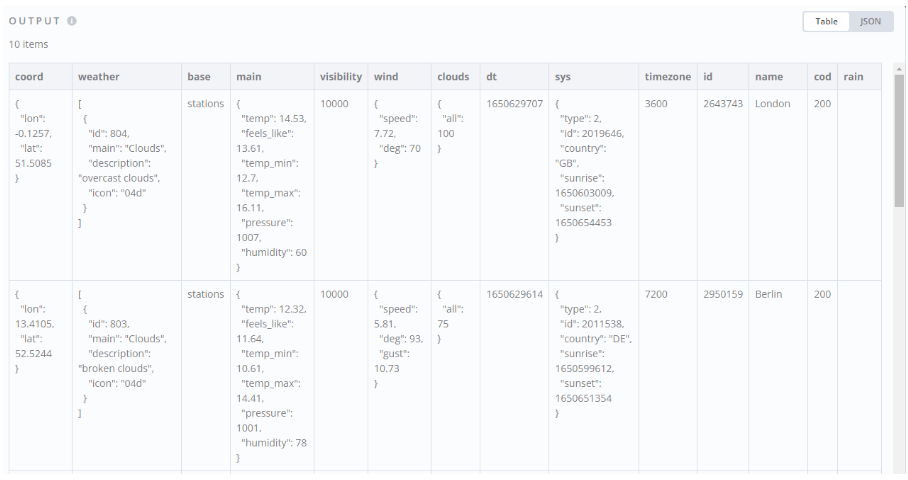
The result is a nested JSON file. To make it more readable and get the data we need, we have to process the JSON output using JavaScript in the Function Node, so the data looks like this:
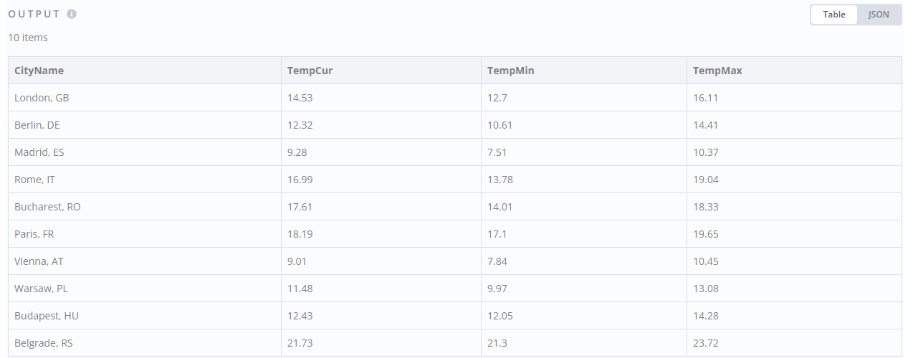
Now we can save the table in CSV format and put the file on the server.
After this is completed we can run an R script that will create an image. For this we need to run an Execute Command Node. The command option is also an expression:
Rscript --vanilla '{{$node["Filename"].json["foldername"]}}dumbbell_plot.R' '{{$node["Filename"].json["foldername"]}}{{$node["Filename"].json["filename"]}}.csv' '{{$node["Filename"].json["foldername"]}}{{$node["Filename"].json["imgname"]}}.png' >& {{$node["Filename"].json["foldername"]}}{{$node["Filename"].json["filename"]}}.log
Here we call an R script called dumbbell_plot.R and pass two parameters: path to a csv file and an output name. After that we also create a log file. The R script can be found here.
Running the R script generates the following image:
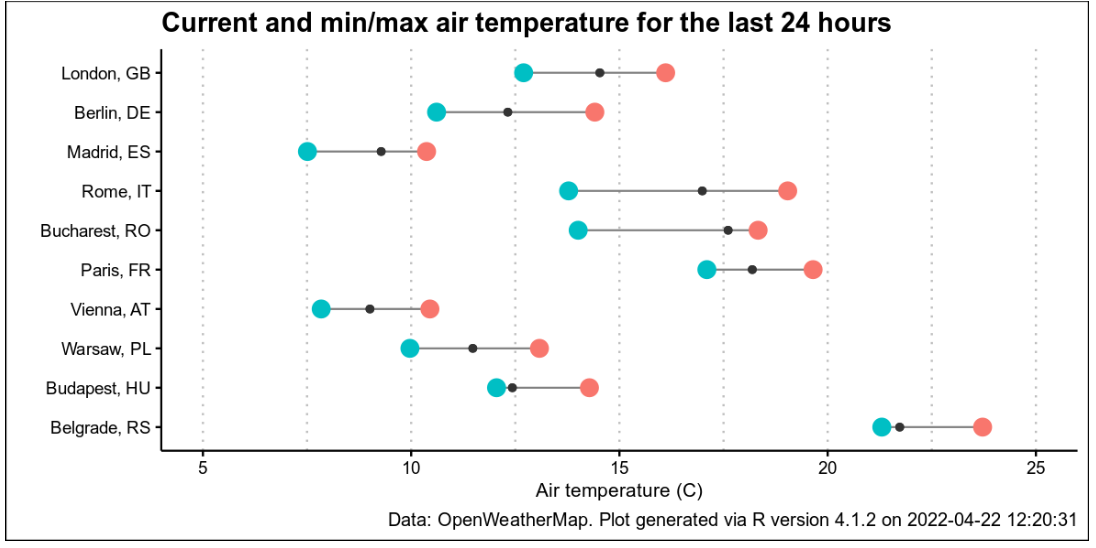
Now we can send the image in a Telegram channel using the Telegram Node.
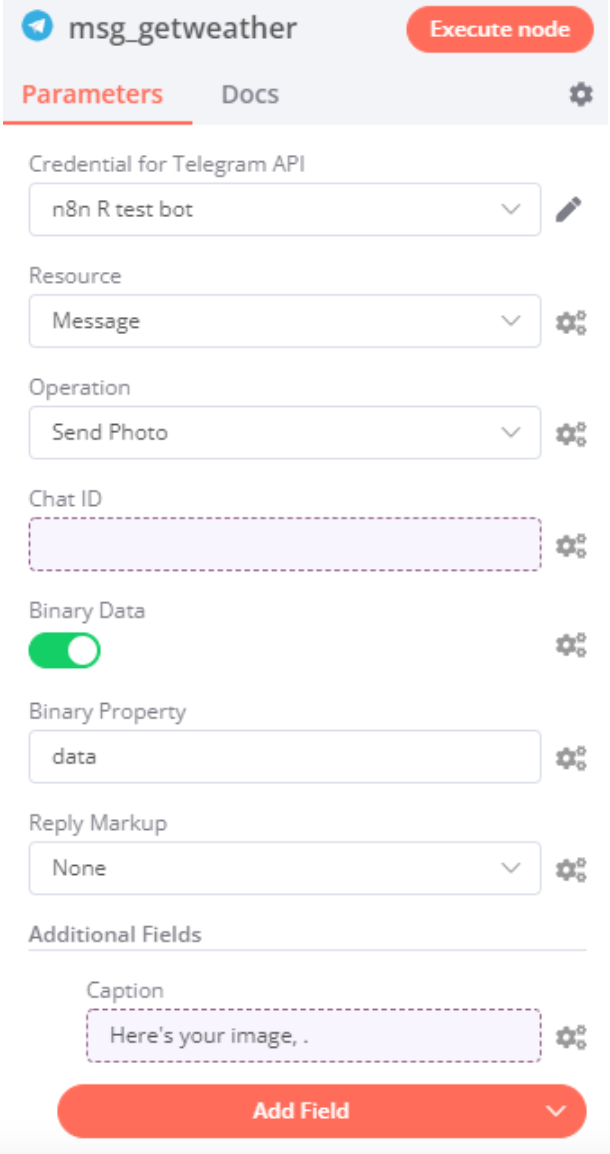
Finally, executing the workflow will run all the nodes and if everything is configured properly, you should get a message from your Telegram bot with the weather plot.
You can test the bot I built here.
What’s next?
Installing the R programming language into the n8n Docker image is not always an optimal solution. First of all, the image takes time to create (around 20 mins depending on the VPS settings). Second, R consumes a significant amount of system resources. It could be better to separate n8n workflow from the the R script and run it either:
- as an API call. Experienced programmers can set up an R server with plumber package; or
- via the SSH Node. It is possible to install R in a separate more powerful VPS which is idle most of the time and is activated via SSH command. Once the image is created it can be downloaded and then delivered to the end user with the Telegram Node.
Start automating!
The best part is, you can start automating for free with n8n. The easiest way to get started is to download the desktop app, or sign up for a free n8n cloud trial. Thanks to n8n’s fair-code license, you can also self-host n8n for free.


