Back to Templates


This workflow contains community nodes that are only compatible with the self-hosted version of n8n.
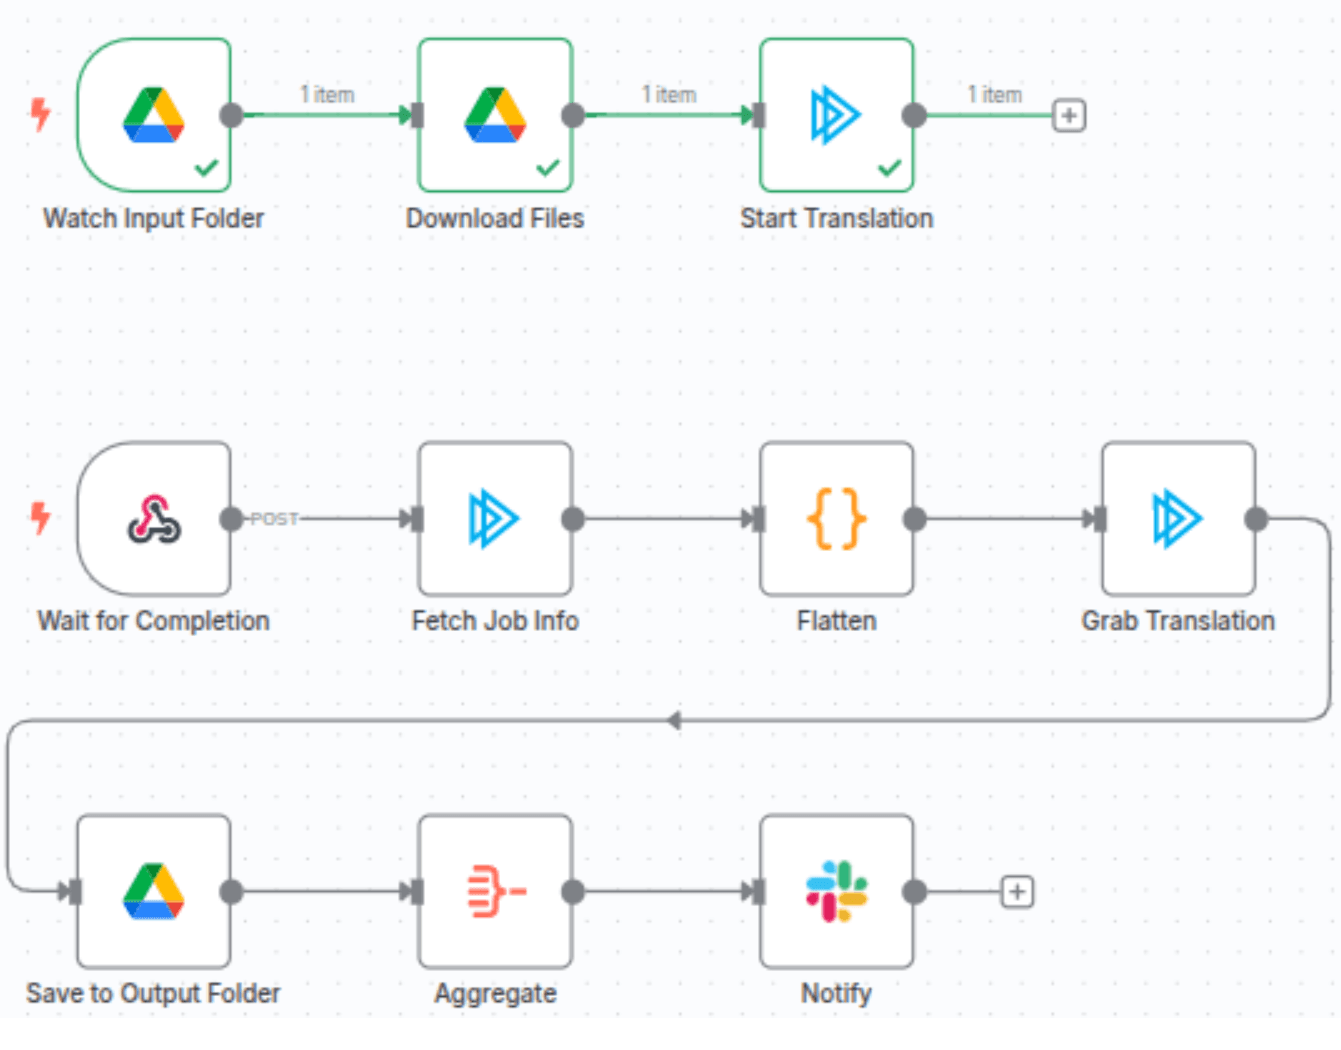
Automate document translation and ensure translation accuracy using Straker Verify, Google Drive and Slack.
How it works?
A workflow step is set up to "watch" a Google Drive folder. When your team members place new files in this folder, they are downloaded. Straker Verify then translates them and provides a quality score.
Once Straker Verify has completed this, the job info is fetched, the translation is saved to an output folder and you are notified via Slack.
What problem does this solve?
When using AI to translate documents, you have no idea about the quality and accuracy of the output. This template answers the question “How good is my translation?” so you have a high level of confidence before you publish.
Who is this for?
This workflow template is designed for businesses needing translation and localization of documents such as text docs, presentations, web pages, transcripts, video subtitles and others. Use it to build workflows that localize your content at scale while maintaining translation quality, accuracy and compliance.
Set up instructions
Straker Verify Integration with n8n
Connect to Straker Verify: Obtain Your API Key
Sign Up/Log In: Visit https://verify.straker.ai/ to create an account or log in.
Navigate to API Keys: Go to Verify → Settings → API Keys. **Copy Your Key:** Find and copy your API key. **Add Key to n8n:** In n8n, go to Settings → Credentials → Straker Verify`.
Set Up Credentials for the Straker Verify Node
- Open n8n and go to "Credentials".
- From the left sidebar, click on "Credentials".
- Search for "Straker Verify" and select "Straker Verify API" from the dropdown.
- Paste the copied access token from the Verify app and save it.
Assign Credentials to the Node
1.Go to your workflow and open the Straker Verify node.
2.Select the "Straker Verify API" credentials you just created from the dropdown (Credentials to connect with), and save.
✅ You are now ready to use the workflow.
Workflow Steps
Step 1: Initiate Workflow – Upload Files to Google Drive
1.Upload one or more files to the designated Google Drive folder.
This triggers the "New File in Google Drive" node in n8n.
Step 2: Verify Token Balance
The workflow checks your token balance via:
Get Current User BalanceUser Has Enough Tokens- Not enough tokens?
You will receive a Slack message:
Not enough tokens
Please top up and re-upload your files.
Step 3: Select Workflow
The system fetches available workflows via:
Fetch All Users Workflows
No matching workflow found?
You'll be notified via Slack:
No workflow found
Step 4: Create Project in Straker Verify
The following steps are handled automatically:
Fetch language/project options
Download files from Google Drive
Create a new project using:
Create Straker Project
✅ You'll receive a Slack confirmation: > "Project created – ID:xxxxxx"
Step 5: Process Completion & File Return
Once files are processed by Straker:
TheIncoming Translation Resultwebhook is triggered.
The workflow:
Downloads processed files:Get File Content from Strakerh - Uploads them to Google Drive:Upload File to Google Drivee
Step 6: Confirmation - Workflow Complete
You'll receive a final Slack message:
"Workflow complete – Files are now available in Google Drive"