Back to Templates


Still manually copy-pasting your Tally form responses?
What if every submission went straight into Airtable — and the user got an automatic email right after?
That’s exactly what this workflow does.
No code, no headache — just a simple and fast automation:
Tally → Airtable → Gmail.

STEP 1 — Capture Tally Form Responses

Goal
Trigger the workflow automatically every time someone submits your Tally form.
What we're setting up
A webhook that catches form responses and kicks off the rest of the flow.
Steps to follow
Add a Webhook node
Parameter : Value
Method : POST
Path : formulaire-tally
Authentication : None
Respond : Immediately
Save the workflow
→ This will generate a URL like:
https://your-workspace.n8n.cloud/webhook-test/formulaire-tally
*
💡 Use the Test URL first (found under Parameters > Test URL)
Head over to Tally
Go to your form → Form Settings > Integrations > Webhooks
Paste the Test URL into the Webhook field
Enable the webhook ✅
Submit a test entry
→ Tally won’t send anything until a real submission is made.
This step is required for n8n to capture the structure.
Expected output
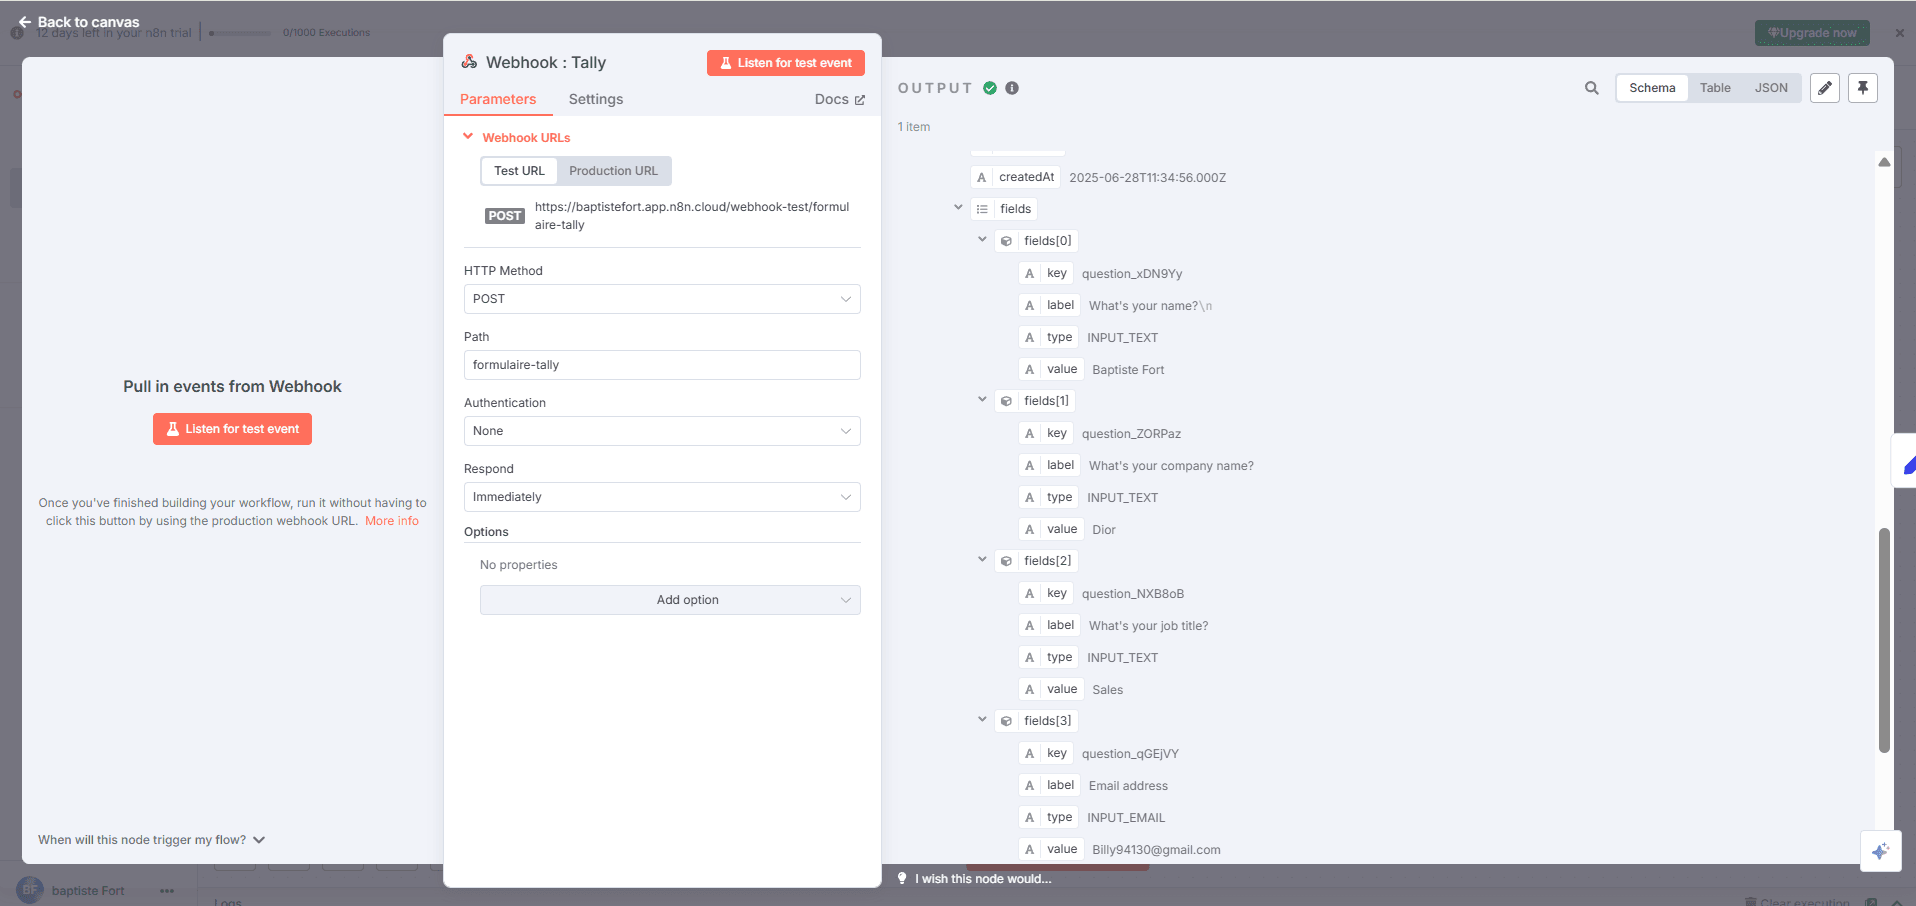
n8n receives a JSON object containing:
General info (IDs, timestamps, etc.)
A fields[] array with all the form inputs (name, email, etc.)
Each field is nicely structured with a label, key, type, and most importantly, a value.
Perfect foundation for the next step: data cleanup.
STEP 2 — Clean and Structure the Form Data (Set node)
Goal
Take the raw data sent by Tally and turn it into clean, readable JSON that's easy to use in the rest of the workflow.
Tally sends the responses inside a big array called field.
Can you grab a field directly with something like {{$json["fields"][3]["value"]}}? Yes.
But a good workflow is like a sock drawer — when everything’s folded and labeled, life’s just easier.
So we’re going to clean it up using a Set node.
Steps to follow
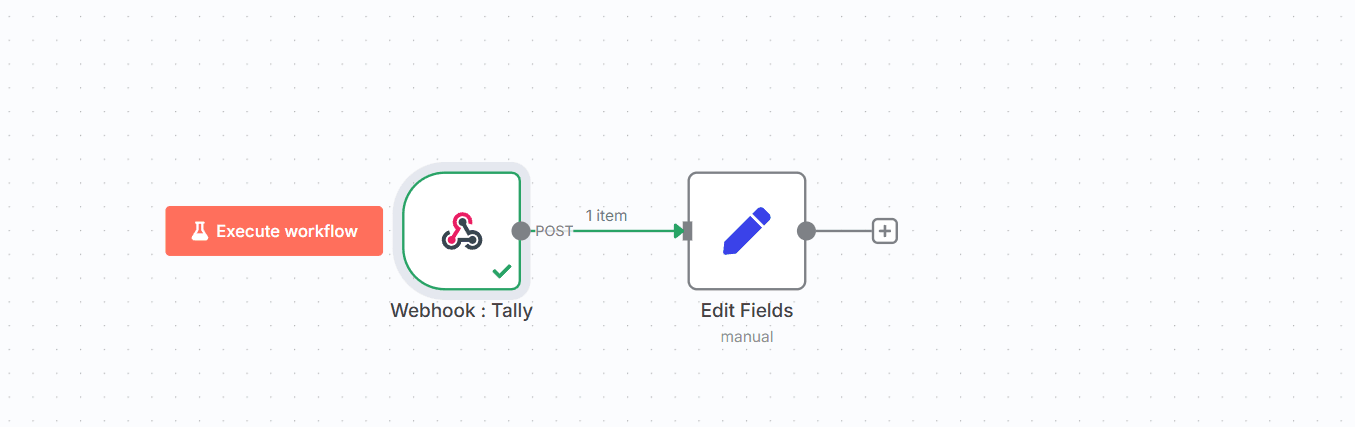
Add a Set node right after the Webhook.
Enable the “Keep only set” option.
Define the following fields in the Set node:
Field name: Expression
full_name: {{$json["fields"][0]["value"]}}
company_name: {{$json["fields"][1]["value"]}}
job_title: {{$json["fields"][2]["value"]}}
email: {{$json["fields"][3]["value"]}}
phone_number: {{$json["fields"][4]["value"] ?? ""}}
submission_date: {{$now.toISOString()}}
⚠️ The order of fields[] depends on your Tally form. If you change the question order, make sure to update these indexes accordingly.
Expected output
You’ll get a clean, structured JSON like this:
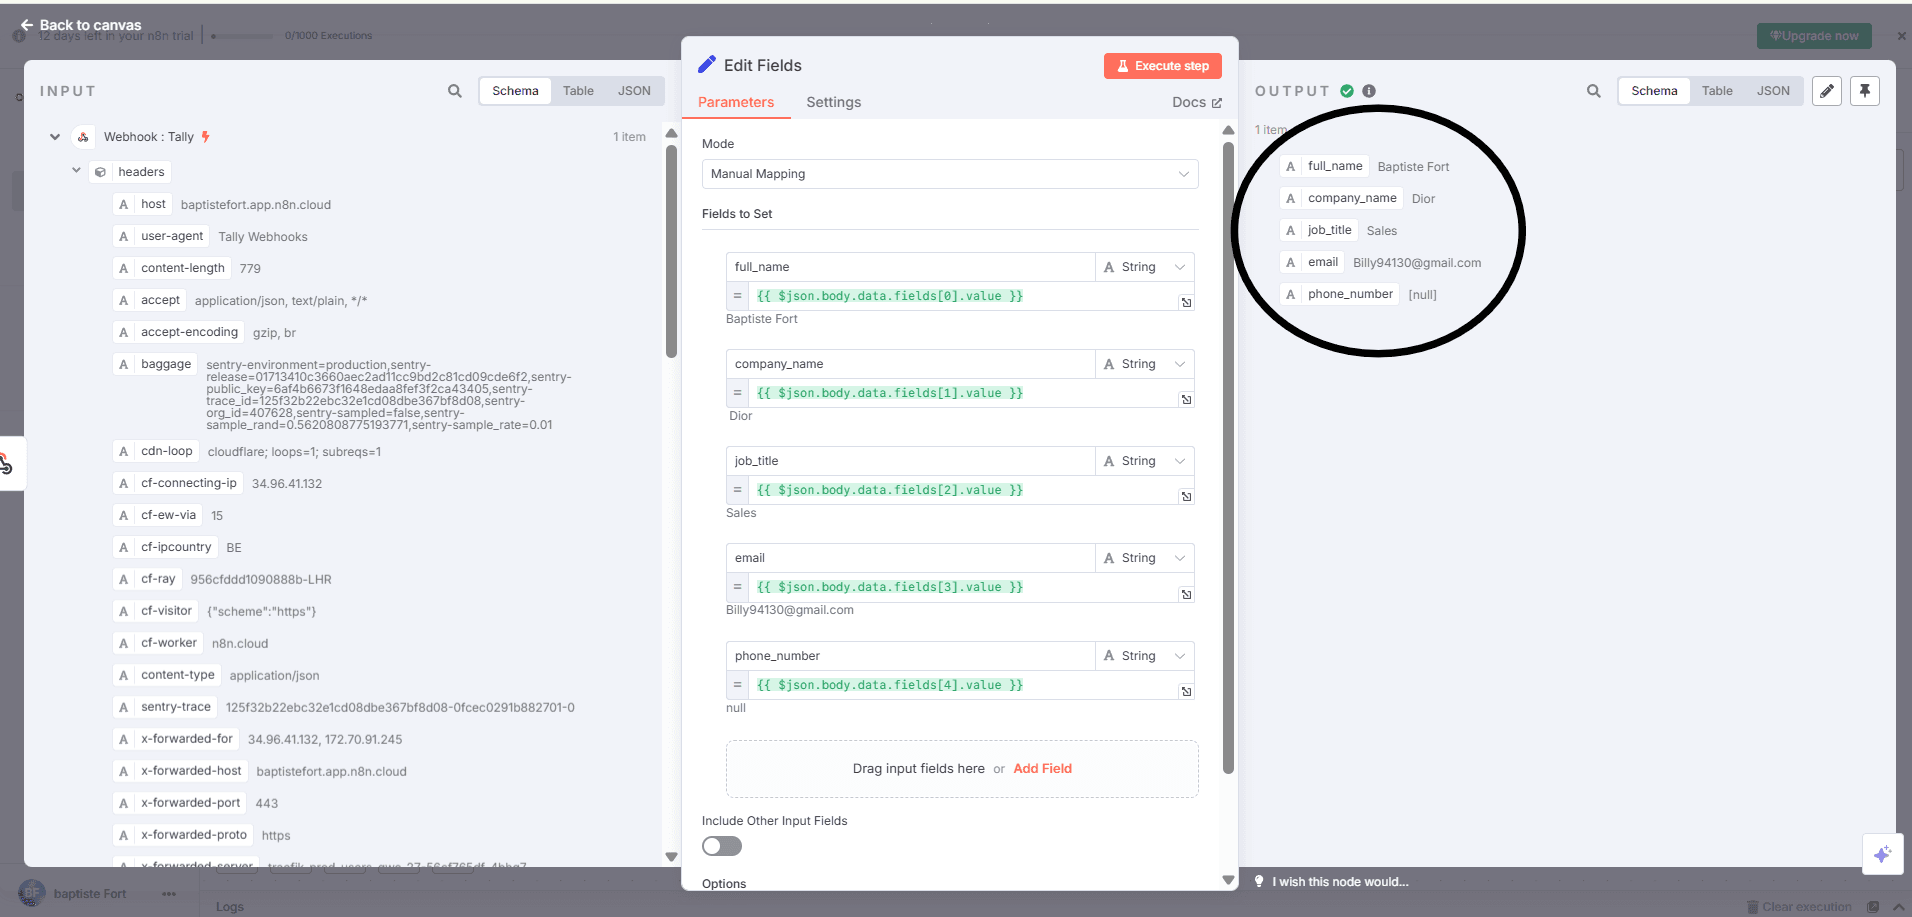
Now your data is clear, labeled, and ready for the rest of your workflow.
STEP 3 — Save Data in Airtable
Goal
Every time someone submits your Tally form, their info is automatically added to an Airtable base. No more copy-pasting — everything lands right where it should.
Steps to follow
- Create your Airtable base
Start by creating a base named Leads (or whatever you prefer), with a table called Form Submissions.
Add the following columns in this exact order so everything maps correctly later:
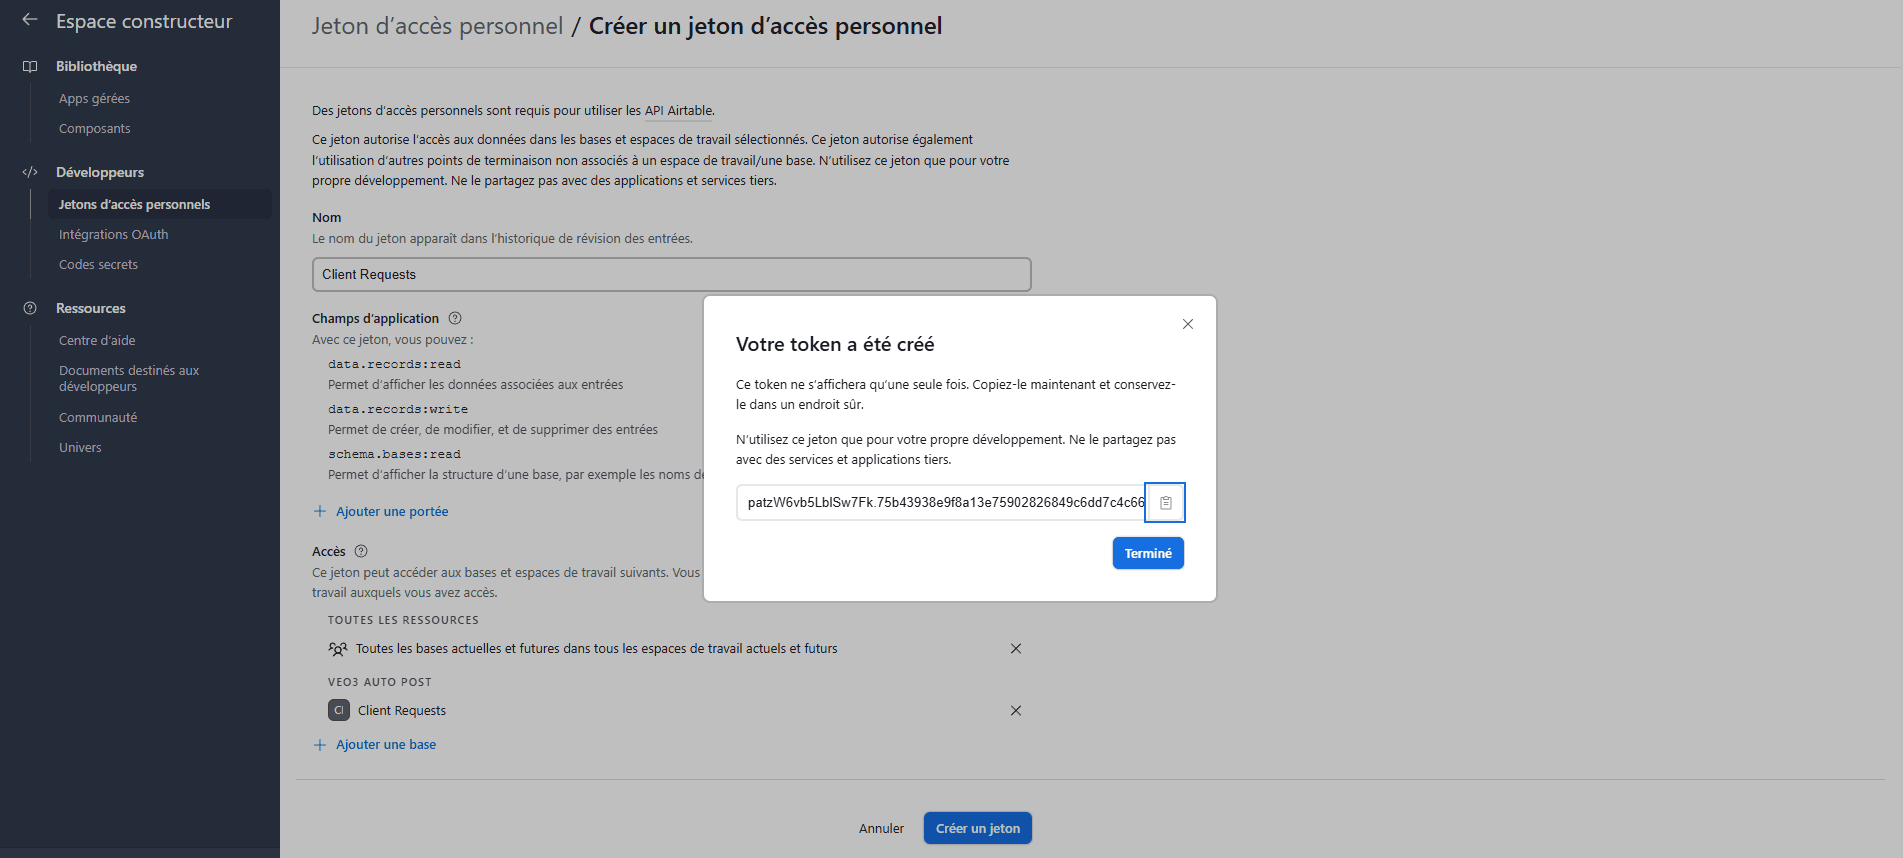
Generate an Airtable token
So n8n can send data into your base:
Go to 👉 https://airtable.com/create/tokens
Click Create token
Give it a name (e.g. Tally Automation)
Check the following permissions:
data.records:read
data.records:write
schema.bases:read
Under Base access, either choose your base manually or select “All current and future bases”
Click Create token and copy the generated key
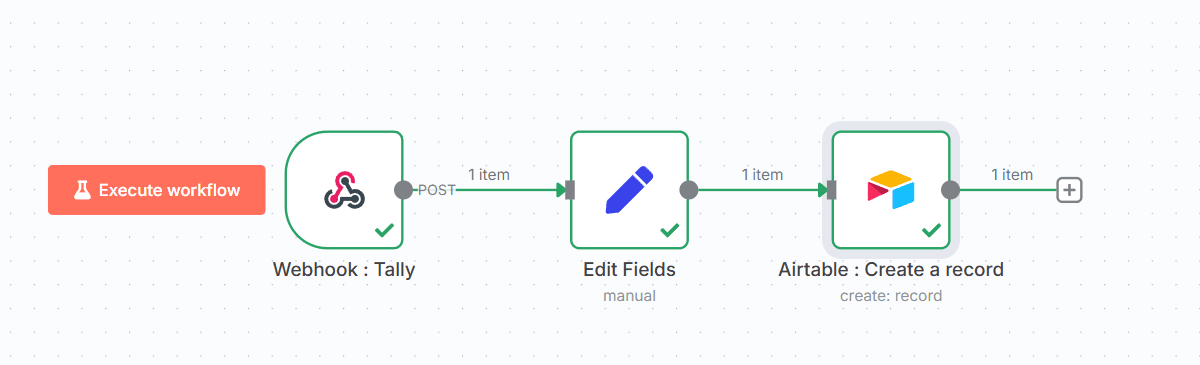
Add configure the Airtable node in n8n
Node: Airtable
Operation: Create
Authentication: Personal Access Token
Paste your token
n8n will suggest your base and table (or you can manually grab the IDs from the URL:
https://airtable.com/appXXXXXXXX/tblYYYYYYYY/...)
Map your fields
Inside the Airtable node, add the following field mappings:
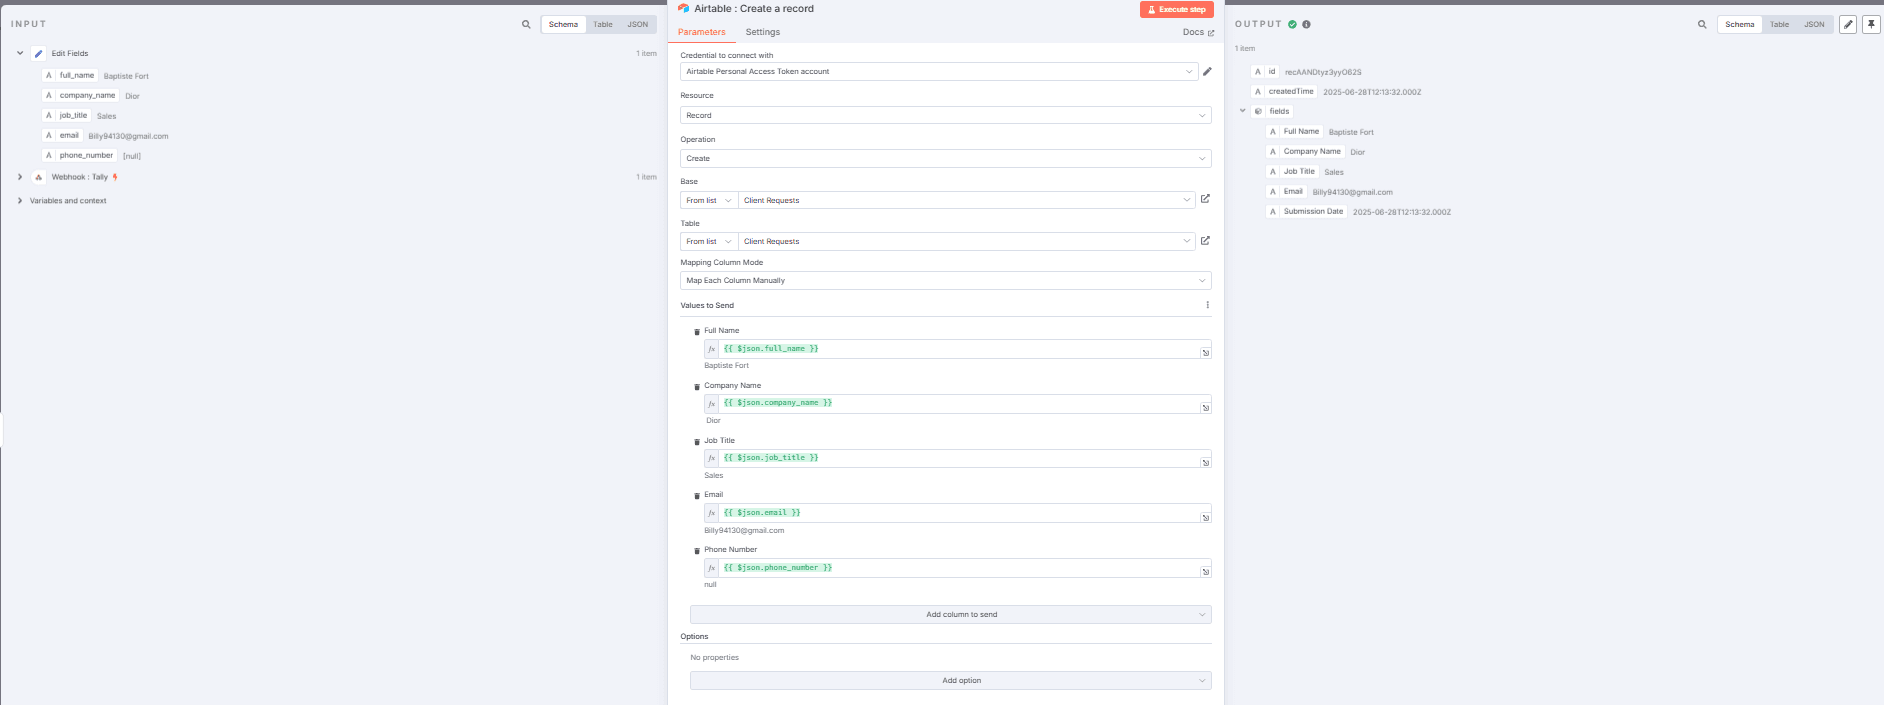
Every new Tally form submission automatically creates a new row in your Airtable base.
STEP 4 — Send an Automatic Confirmation Email
Goal
Send a professional email as soon as a form is completed
Steps to follow
- Add a Wait node
You don’t want the email to go out instantly — it feels cold and robotic.
→ Add a Wait node right after Airtable.
Mode: Wait for a period of time
Delay: 5 to 10 minutes
Unit: Minutes
- Add a Gmail > Send Email node
Authentication: OAuth2
Connect a Gmail account (business or test)
⚠️ No API keys here — Gmail requires OAuth.
- Configure the Send Email node
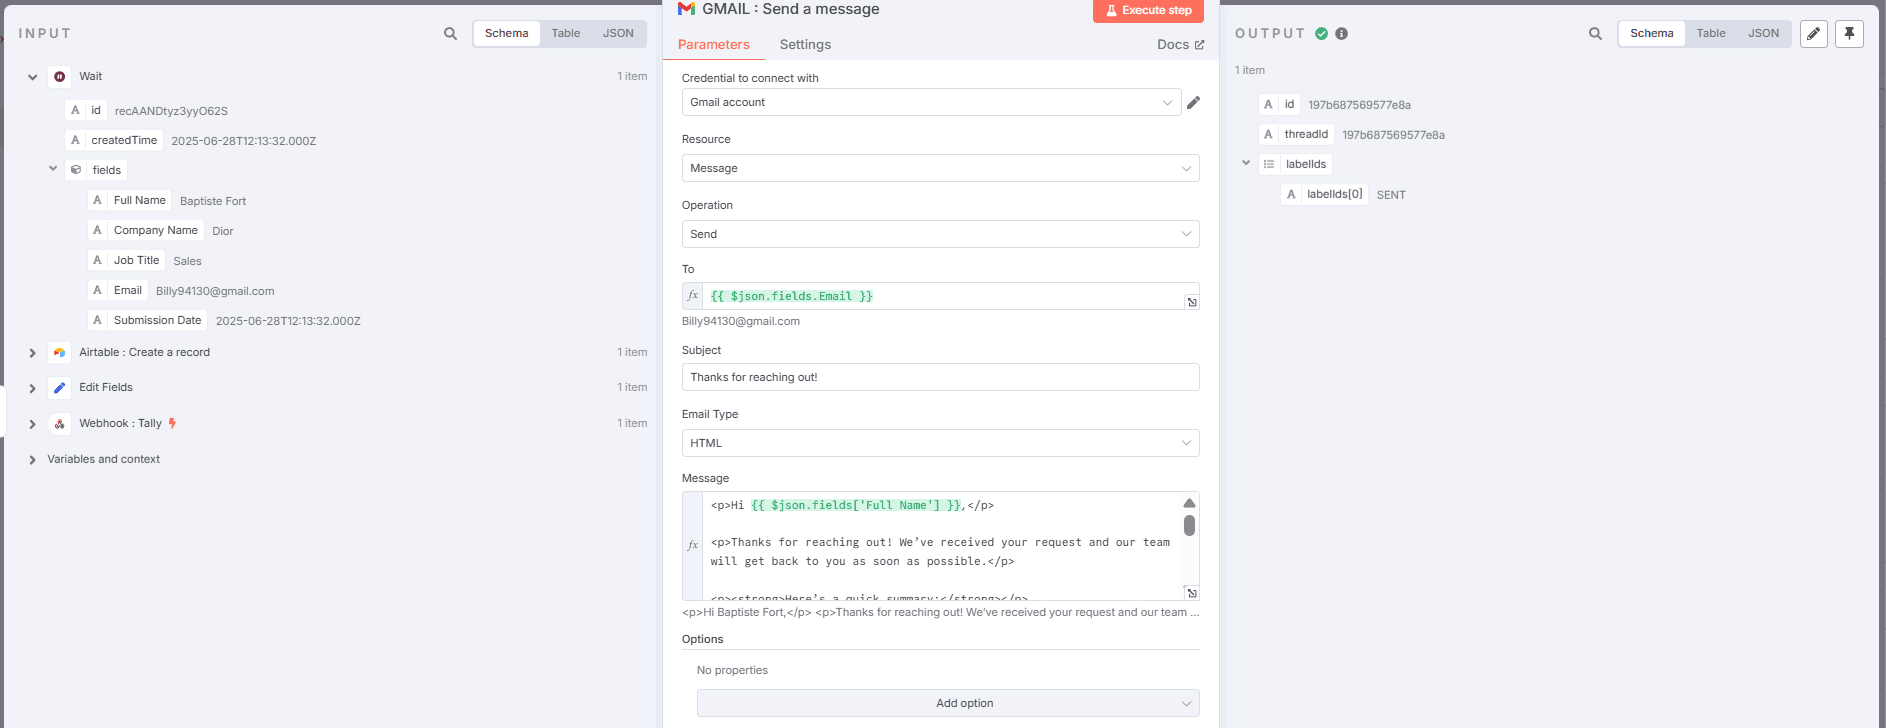
Field Value
Credential to connect with Gmail account via OAuth2
Resource : Message
Operation : Send
To : {{ $json.fields["Email"] }}
Subject : Thanks for reaching out!
Email Type : HTML
Message: (but do the mapping correctly using the Input so that lead receives its name correctly )
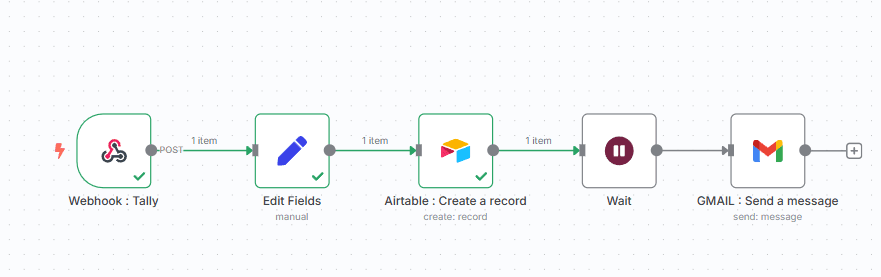
End of the Workflow
And that’s it — your automation is live!
Your lead fills out the Tally form → the info goes to Airtable → they get a clean, professional email without you doing a thing.
