Back to Templates


A Game-Changer in Dynamic Content Generation!
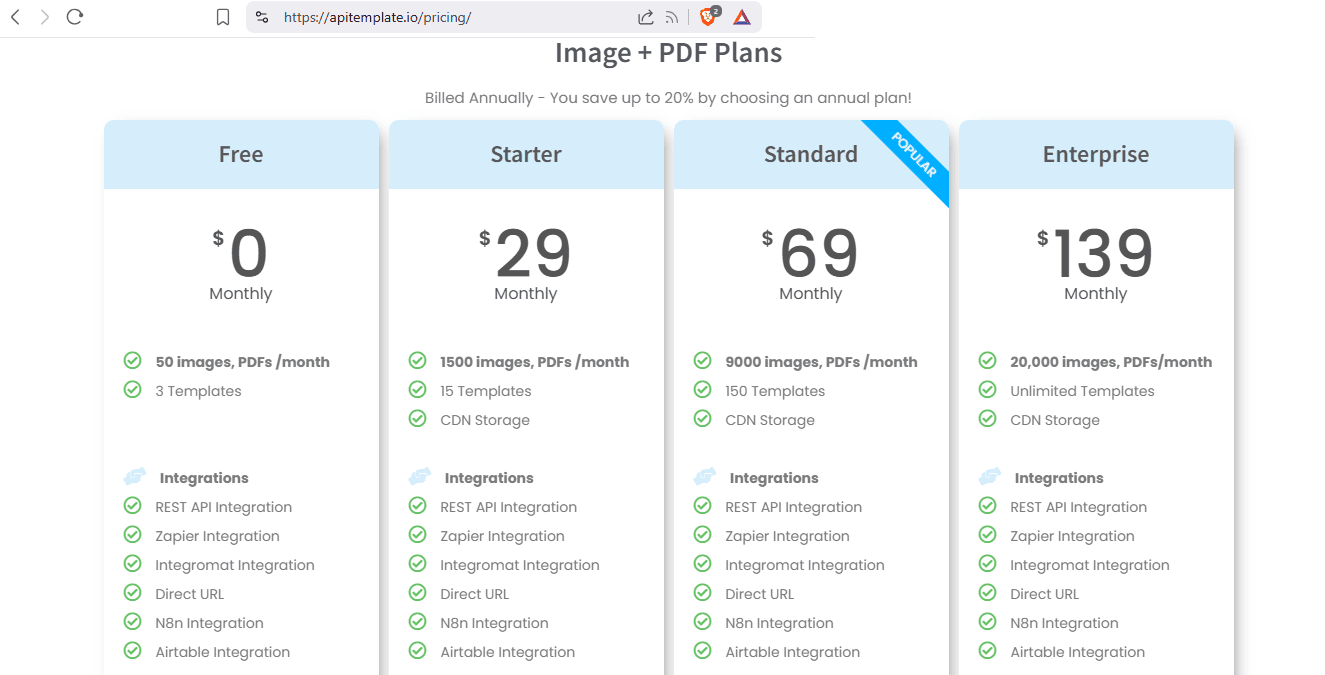
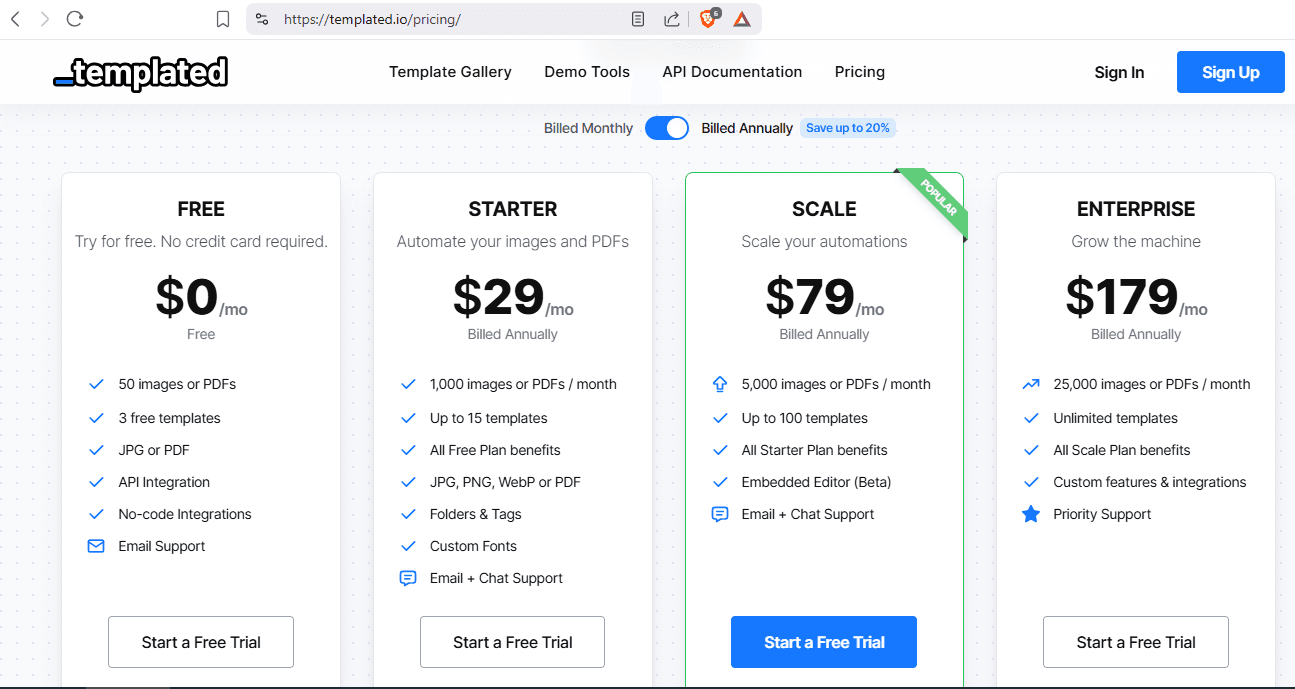
In a world where Templated.io and ApiTemplate.io charge between $29 to $179/month, we’re flipping the script…
What if you could get all the power – for FREE?
We’re proud to introduce our N8N workflow, a modern, fast, and developer-friendly tool for generating dynamic images with $zero subscription fees.
No pricing tiers.
No usage caps.
No hidden fees.
Just pure value – 100% free.
How We Compare:
or
But we are always Free
Note: Pricing is based on 2025-04-01 and the free imagekit plan.
Why Free?
We believe that powerful tools should be accessible to everyone — startups, developers, creators, and students alike. Our mission is to empower you to create amazing things without breaking the bank.
What is a template idea, and how can you build one? (With examples)
Follow this page to better understand everything. Add overlays on images
Get Started in Seconds
No credit card. No trials. No limitations.
Just sign up and start creating.
What You Need
How to Generate imagekit API
-
After signing up, go to the ImageKit dashboard. On the left sidebar, scroll down until you find "Developer Options", then click on it.
-
Choose your preferred method of integration – either API keys or Webhooks. In this case, we will proceed with the API option.
-
On the right side of the screen, you will see your Private Key. This is the API key you'll need for your n8n workflow, along with code samples in different programming languages.
-
For beginners: If you're not familiar with how to connect using the code from the previous step, simply visit this link: Upload file V1
-
On the right side of that page, enter your Private Key in the input field labeled "API Key", then click on the "Send API Request" button.
-
Once the request is sent, scroll down to view the Shell/cURL code. From this code, copy only the part that looks like this:
--header 'Authorization: Basic ...'
and use it in your n8n workflow.
N8N Workflow Setup
1- Import the workflow into n8n.
2- Add imagekit API.
3- Follow the instructions in the workflow.
4- Test & launch