Back to Templates


Who is it for?
This workflow is perfect for marketers, sales teams, agencies, and local businesses who want to save time by automating lead generation from Google Maps.
It’s ideal for real estate agencies, restaurants, service providers, and any local niche that needs a clean database of fresh contacts, including emails, websites, and phone numbers.
✅ Prerequisites
Before starting, make sure you have:
- Apify account → to scrape Google Maps data
- OpenAI API key → for GPT-4 email extraction
- Airtable account & base → for structured lead storage
- Gmail account with OAuth → to send personalized outreach emails
Your Airtable base should have these columns:
| Title | Street | Website | Phone Number | URL | |
|---|---|---|---|---|---|
| Paris Real Estate Agency | 10 Rue de Rivoli, Paris | https://agency.fr | +33 1 23 45 67 | [email protected] | maps.google.com/... |
🏡 Example Use Case
To keep things clear, we’ll use real estate agencies in Paris as an example.
But you can replace this with restaurants, plumbers, lawyers, or even hamster trainers (you never know).
🔄 How the workflow works
- Scrape Google Maps leads with Apify
- Clean & structure the data (name, phone, website)
- Visit each website & extract emails with GPT-4
- Save all leads into Airtable
- Automatically send a personalized email via Gmail
This works for any industry, keyword, or location.
Step 1 – Scraping Google Maps with Apify
Start simply:
Open your n8n workflow and choose the trigger: “Execute Workflow” (manual trigger).
Add an HTTP Request node (POST method).
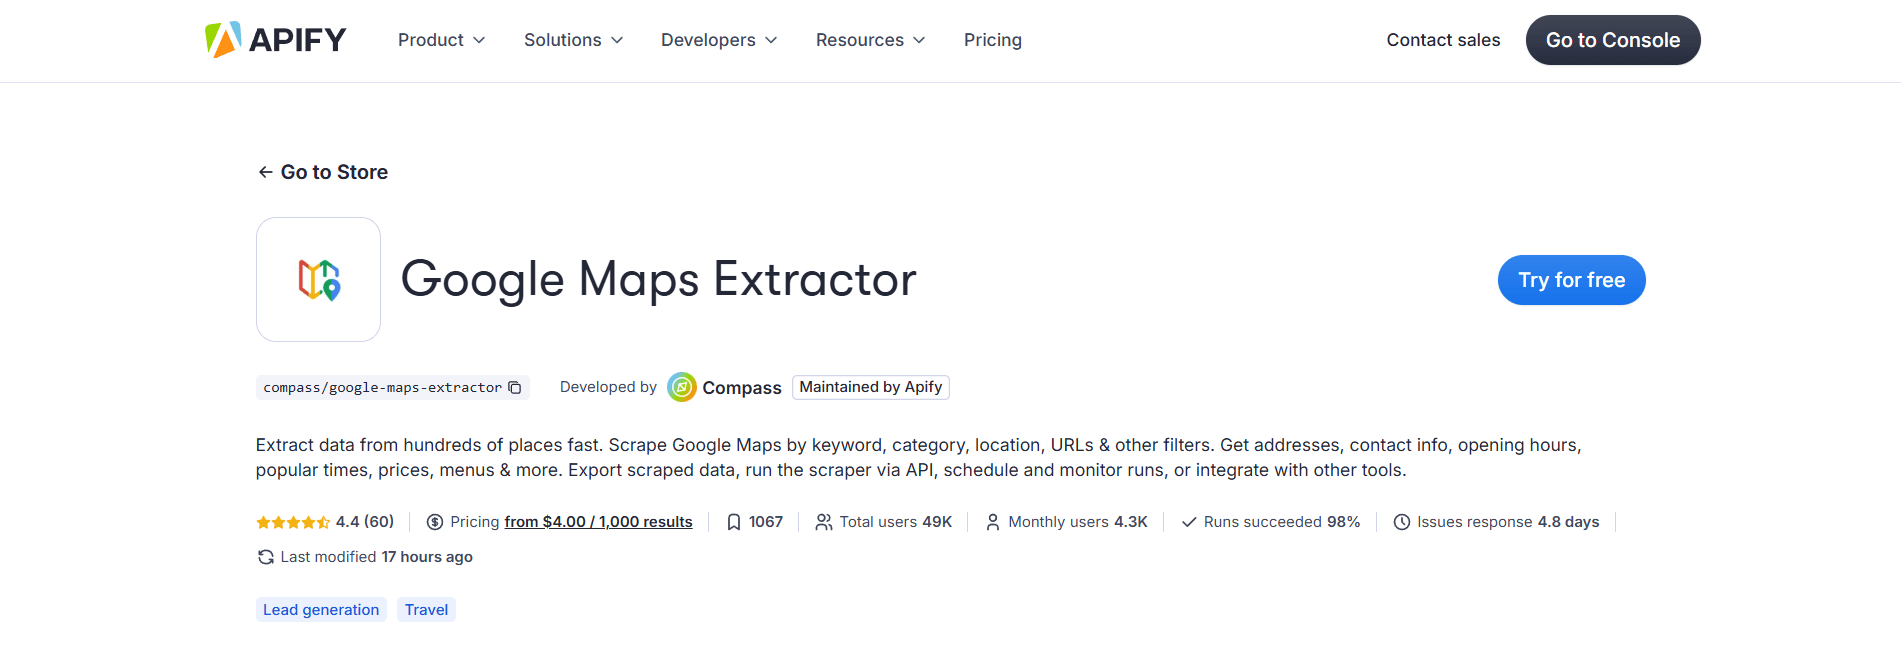
Now, head over to Apify Google Maps Extractor.
Fill in the fields according to your needs:
Keyword: e.g., "real estate agency" (or restaurant, plumber...)
Location: "Paris, France"
Number of results: 50 (or more)
Optional: filters (with/without a website, by categories…)
Click Run to test the scraper.
Then click API → select API endpoints tab.
Choose “Run Actor synchronously and get dataset items”.
Copy the URL, go back to n8n, and paste it into your HTTP Request node (URL field).
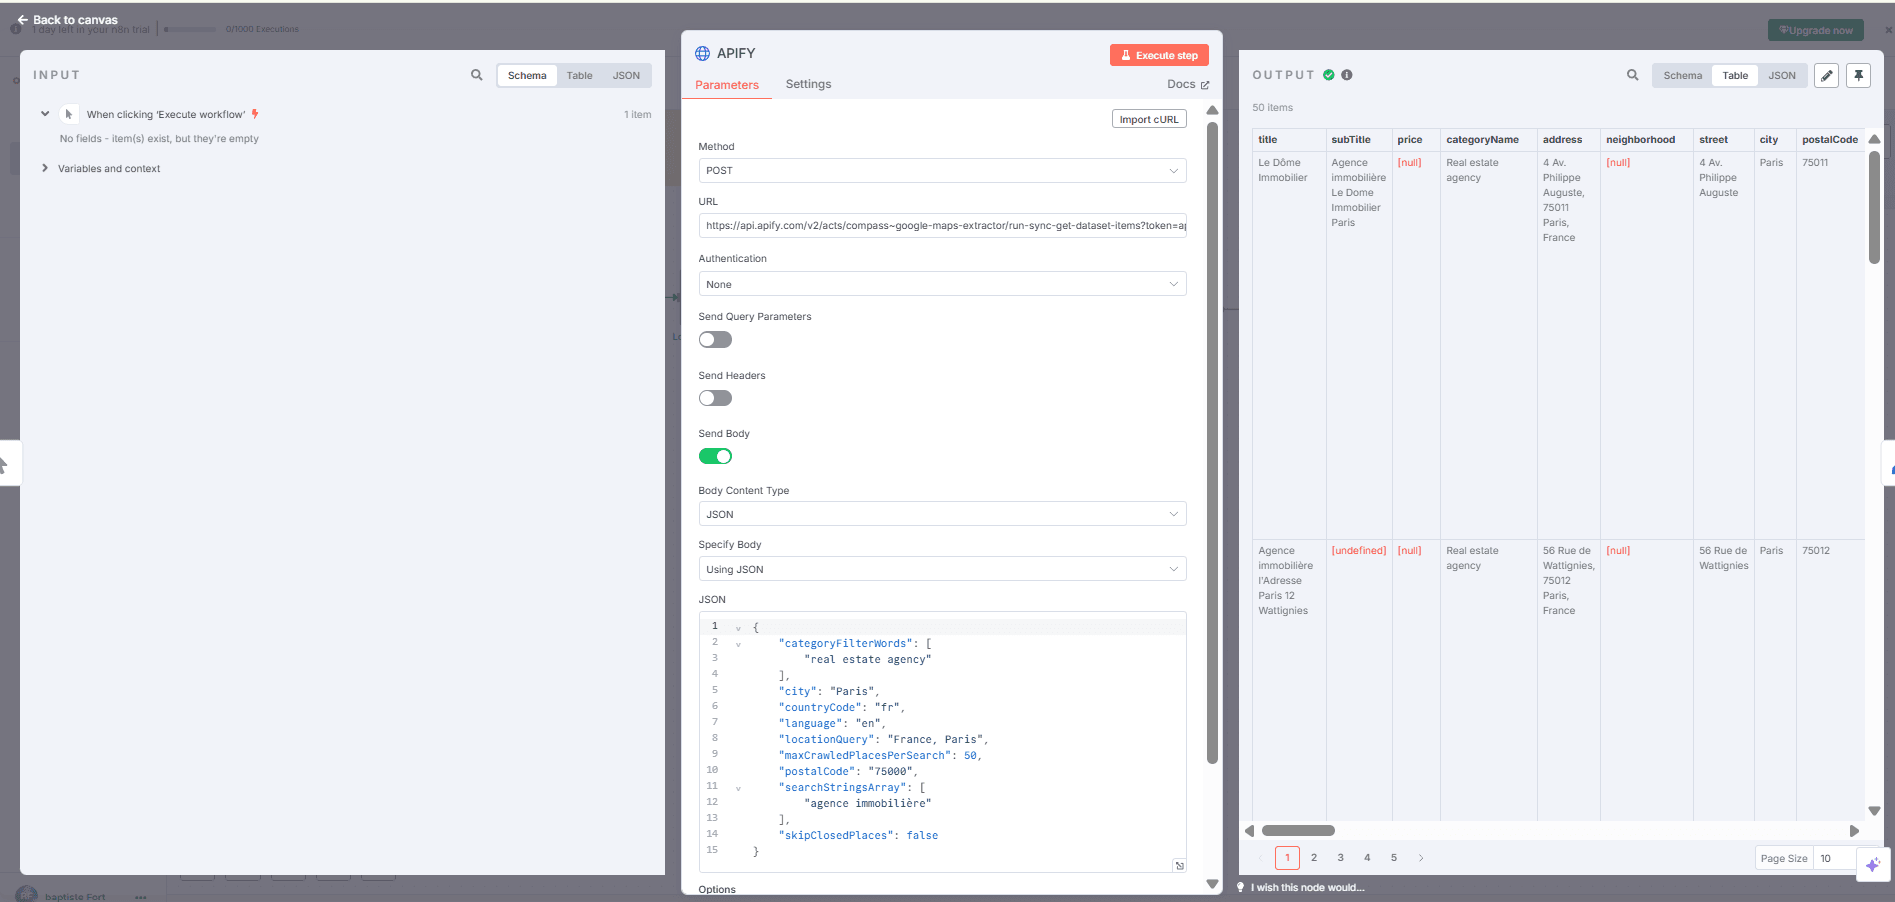
Then enable:
Body Content Type → JSON
Specify Body Using JSON
Go back to Apify, click the JSON tab, copy everything, and paste it into the JSON field of your HTTP Request.
If you now run your workflow, you'll get a nice structured table filled with Google Maps data. Pretty magical already—but we're just getting started!
Step 2 – Cleaning Things Up (Edit Fields)
Raw data is cool, but messy.
Add an Edit Fields node next, using Manual Mapping mode.
Here’s what you keep (copy-paste friendly):
Title → {{ $json.title }}
Address → {{ $json.address }}
Website → {{ $json.website }}
Phone → {{ $json.phone }}
URL → {{ $json.url }}
Now, you have a clean, readable table ready to use.
Step 3 – Handling Each Contact Individually (Loop Over Items)
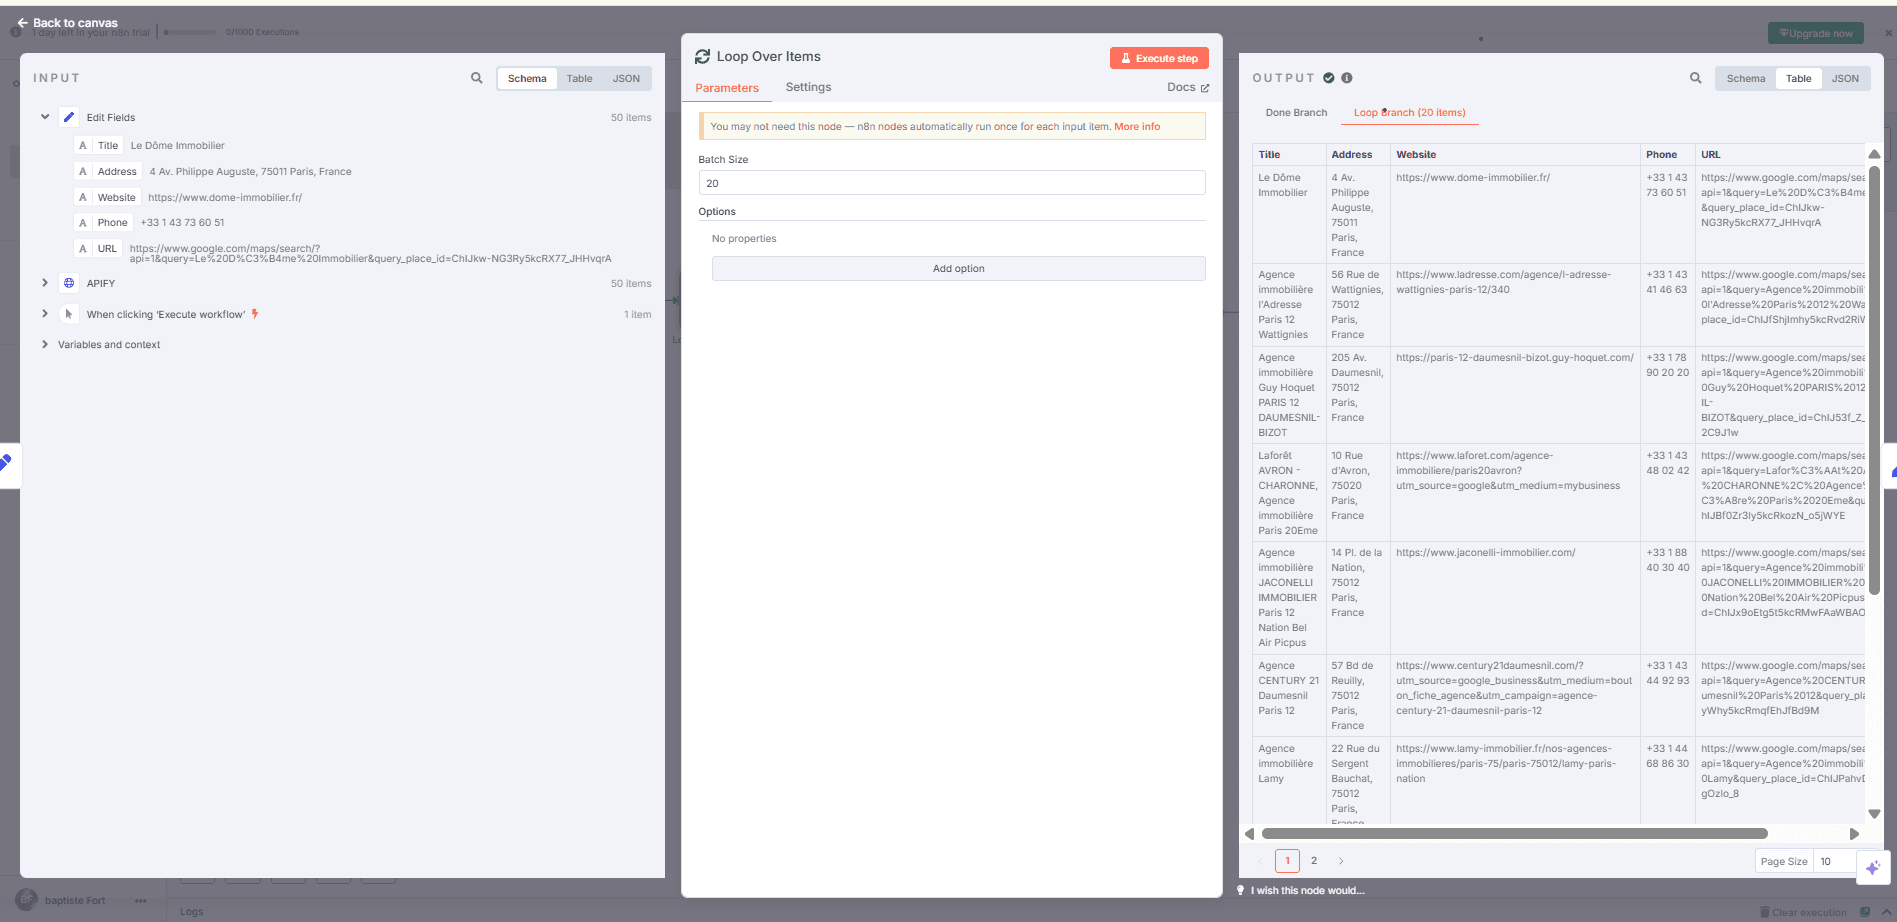
Next, we process each contact one by one.
Add the Loop Over Items node:
Set Batch Size to 20 or more, depending on your needs.
This node is simple but crucial to avoid traffic jams in the automation.
Step 4 – Isolating Websites (Edit Fields again)
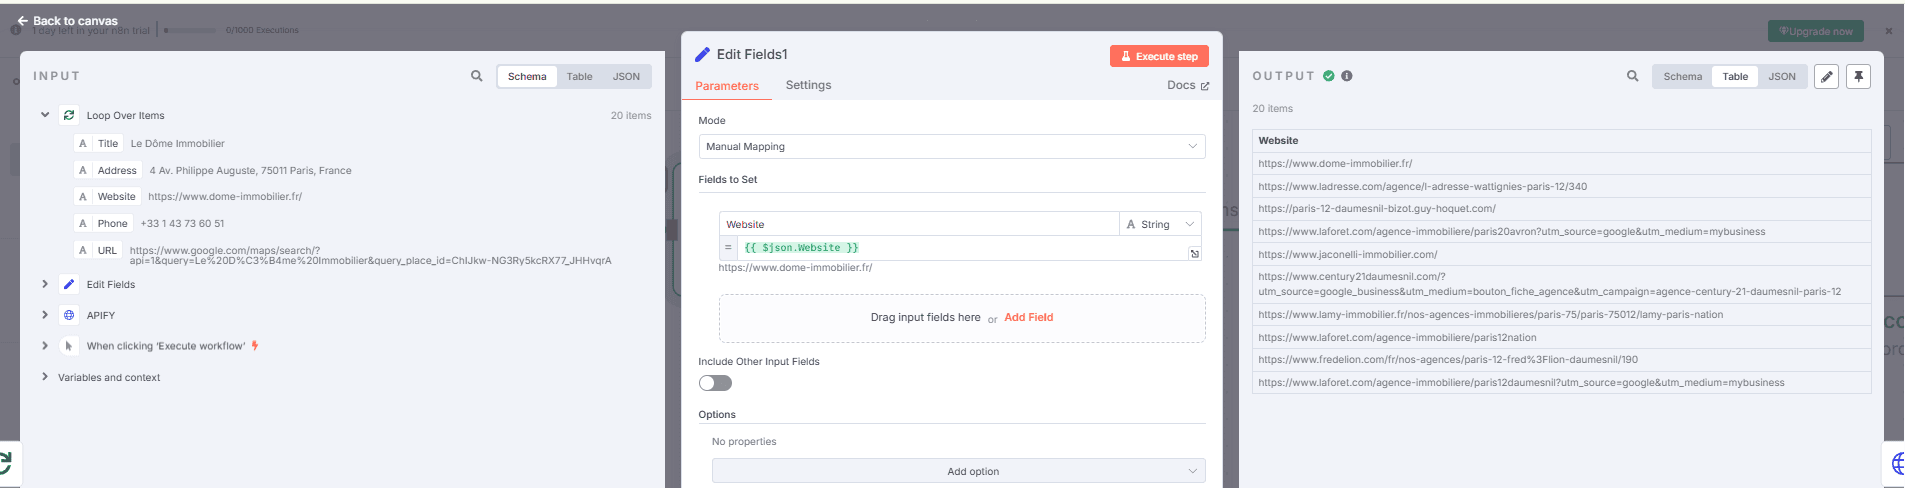
Add another Edit Fields node (Manual Mapping).
This time, keep just:
Website → {{ $json.website }}
We've isolated the websites for the next step: scraping them one by one.
Step 5 – Scraping Each Website (HTTP Request)
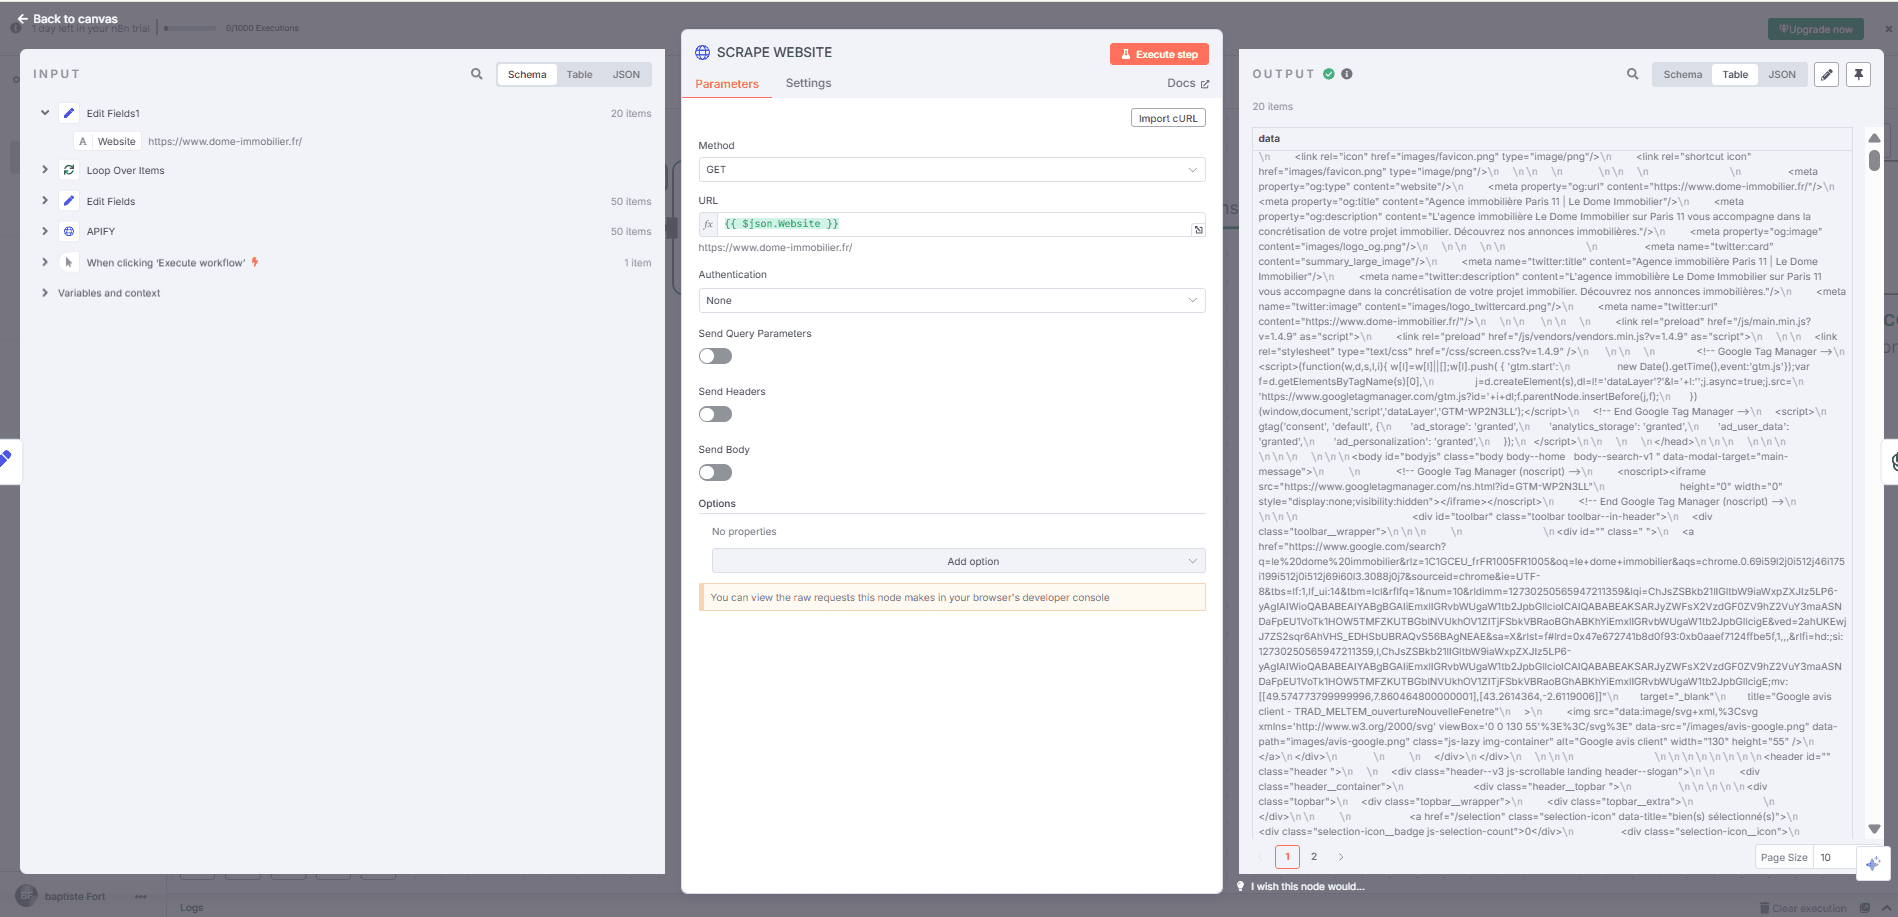
Now, we send our little robot to visit each website automatically.
Add another HTTP Request node:
Method: GET
URL: {{ $json.website }} (from the previous node)
This returns the raw HTML content of each site. Yes, it's ugly, but we won't handle it manually. We'll leave the next step to AI!
Step 6 – Extracting Emails with ChatGPT
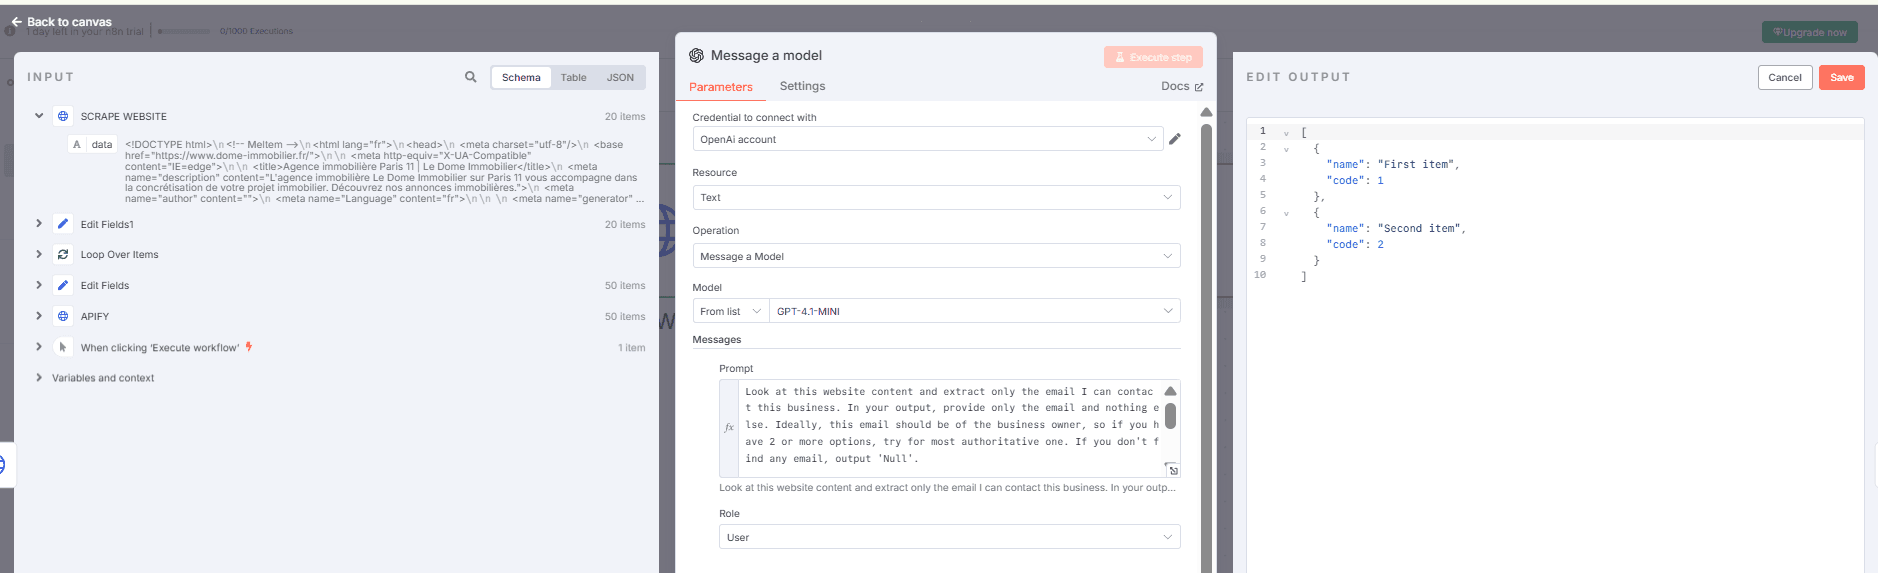
We now use OpenAI (Message a Model) to politely ask GPT to extract only relevant emails.
Configure as follows:
Model: GPT-4-1-mini or higher
Operation: Message a Model
Simplify Output: ON
Prompt to copy-paste:
Look at this website content and extract only the email I can contact this business. In your output, provide only the email and nothing else. Ideally, this email should be of the business owner, so if you have 2 or more options, try for the most authoritative one. If you don't find any email, output 'Null'.
Exemplary output of yours:
[email protected]
{{ $json.data }}
ChatGPT will kindly return the perfect email address (or 'Null' if none is found).
Step 7 – Neatly Store Everything in Airtable
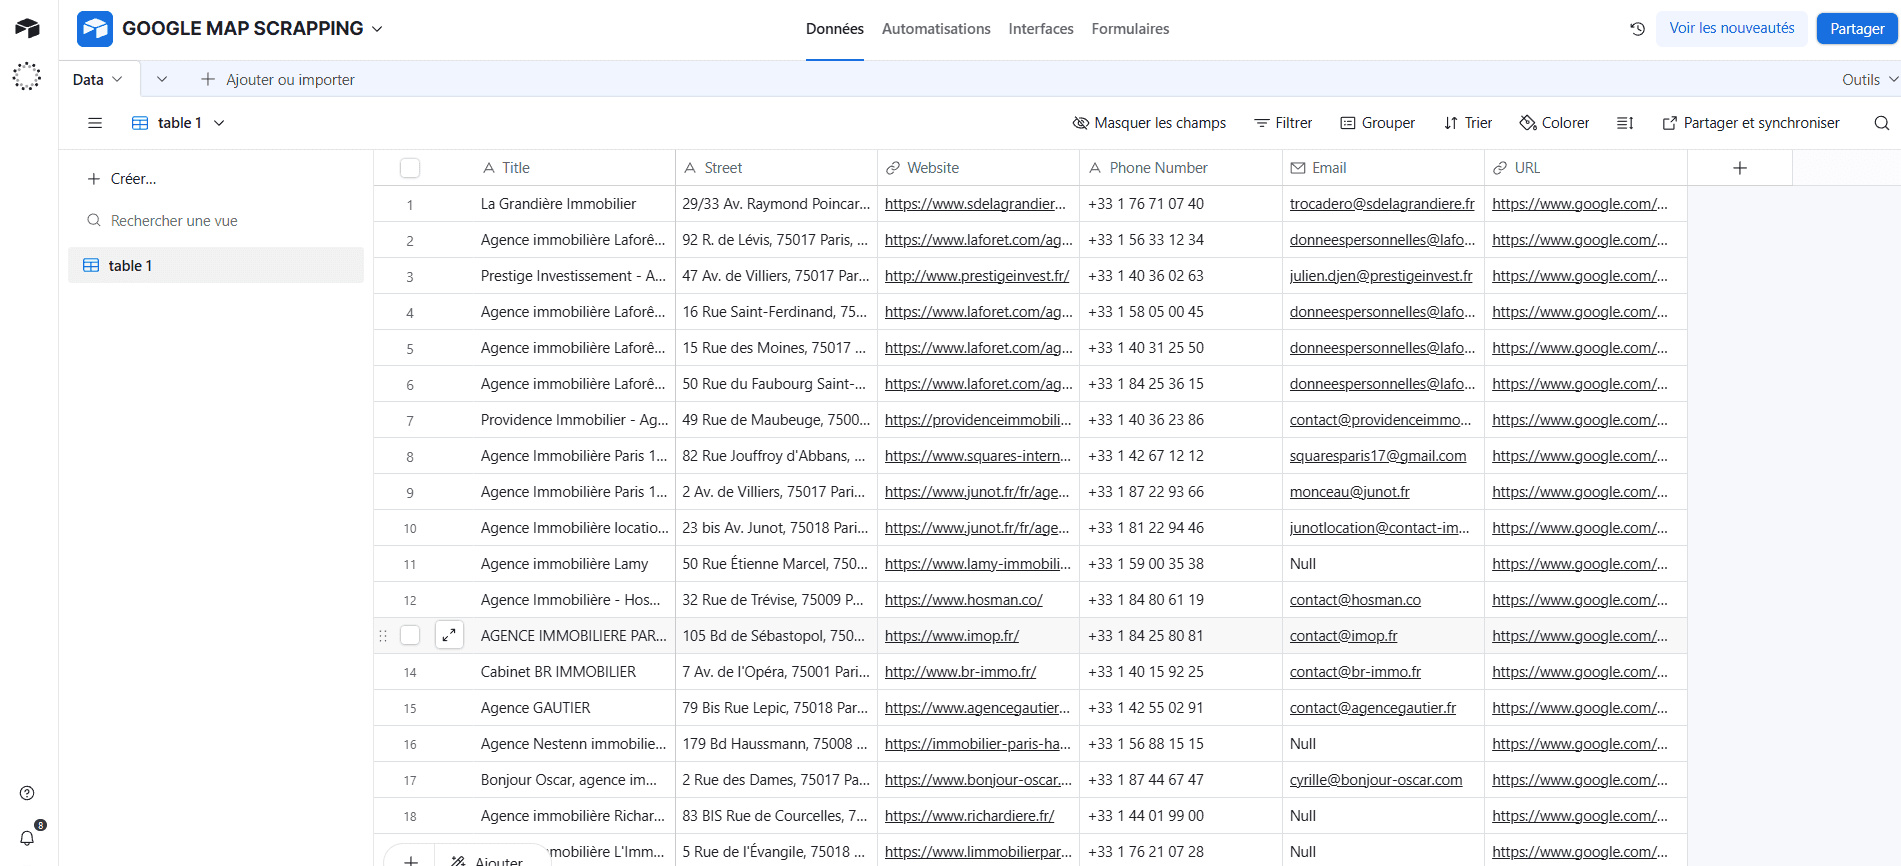
Almost done! Add an Airtable → Create Record node.
Fill your Airtable fields like this:
| Airtable Field | Content | n8n Variable |
|---|---|---|
| Title | Business name | {{ $('Edit Fields').item.json.Title }} |
| Street | Full address | {{ $('Edit Fields').item.json.Address }} |
| Website | Website URL | {{ $('Edit Fields').item.json.Website }} |
| Phone Number | Phone number | {{ $('Edit Fields').item.json.Phone }} |
| Email retrieved by the AI agent | {{ $json.message.content }} |
|
| URL | Google Maps link | {{ $('Edit Fields').item.json.URL }} |
Now, you have a tidy Airtable database filled with fresh leads, ready for action.
Step 8 – Automated Email via Gmail (The Final Touch)
To finalize the workflow, add a Gmail → Send Email node after your Airtable node.
Here’s how to configure this node using the data pulled directly from your Airtable base (from the previous step):
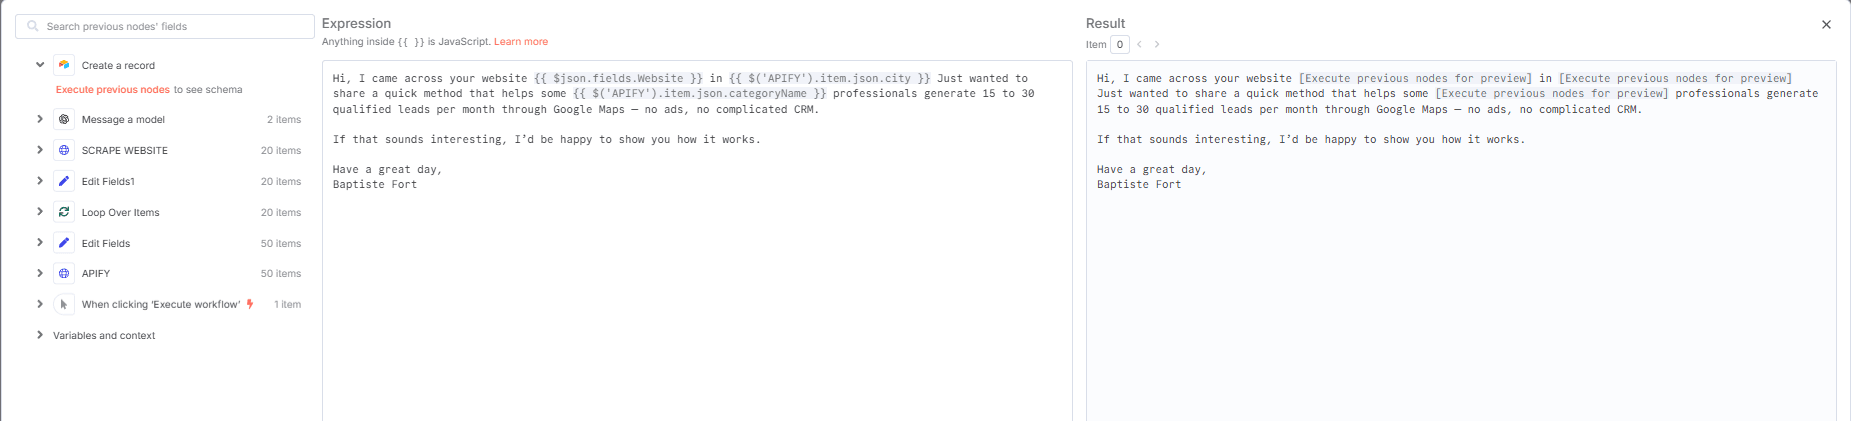
Recipient (To): Retrieve the email stored in Airtable ({{ $json.fields.Email }}).
Subject: Use the company name stored in Airtable ({{ $json.fields.Title }}) to personalize the subject line.
Body: You can include several fields directly from Airtable, such as:
Company name:
{{ $json.fields.Title }}
Website URL:
{{ $json.fields.Website }}
Phone number:
{{ $json.fields["Phone Number"] }}
Link to the Google Maps listing:
{{ $json.fields.URL }}
All of this data is available in Airtable because it was automatically inserted in the previous step (Step 7).
This ensures that each email sent is fully personalized and based on clear, reliable, and structured information.