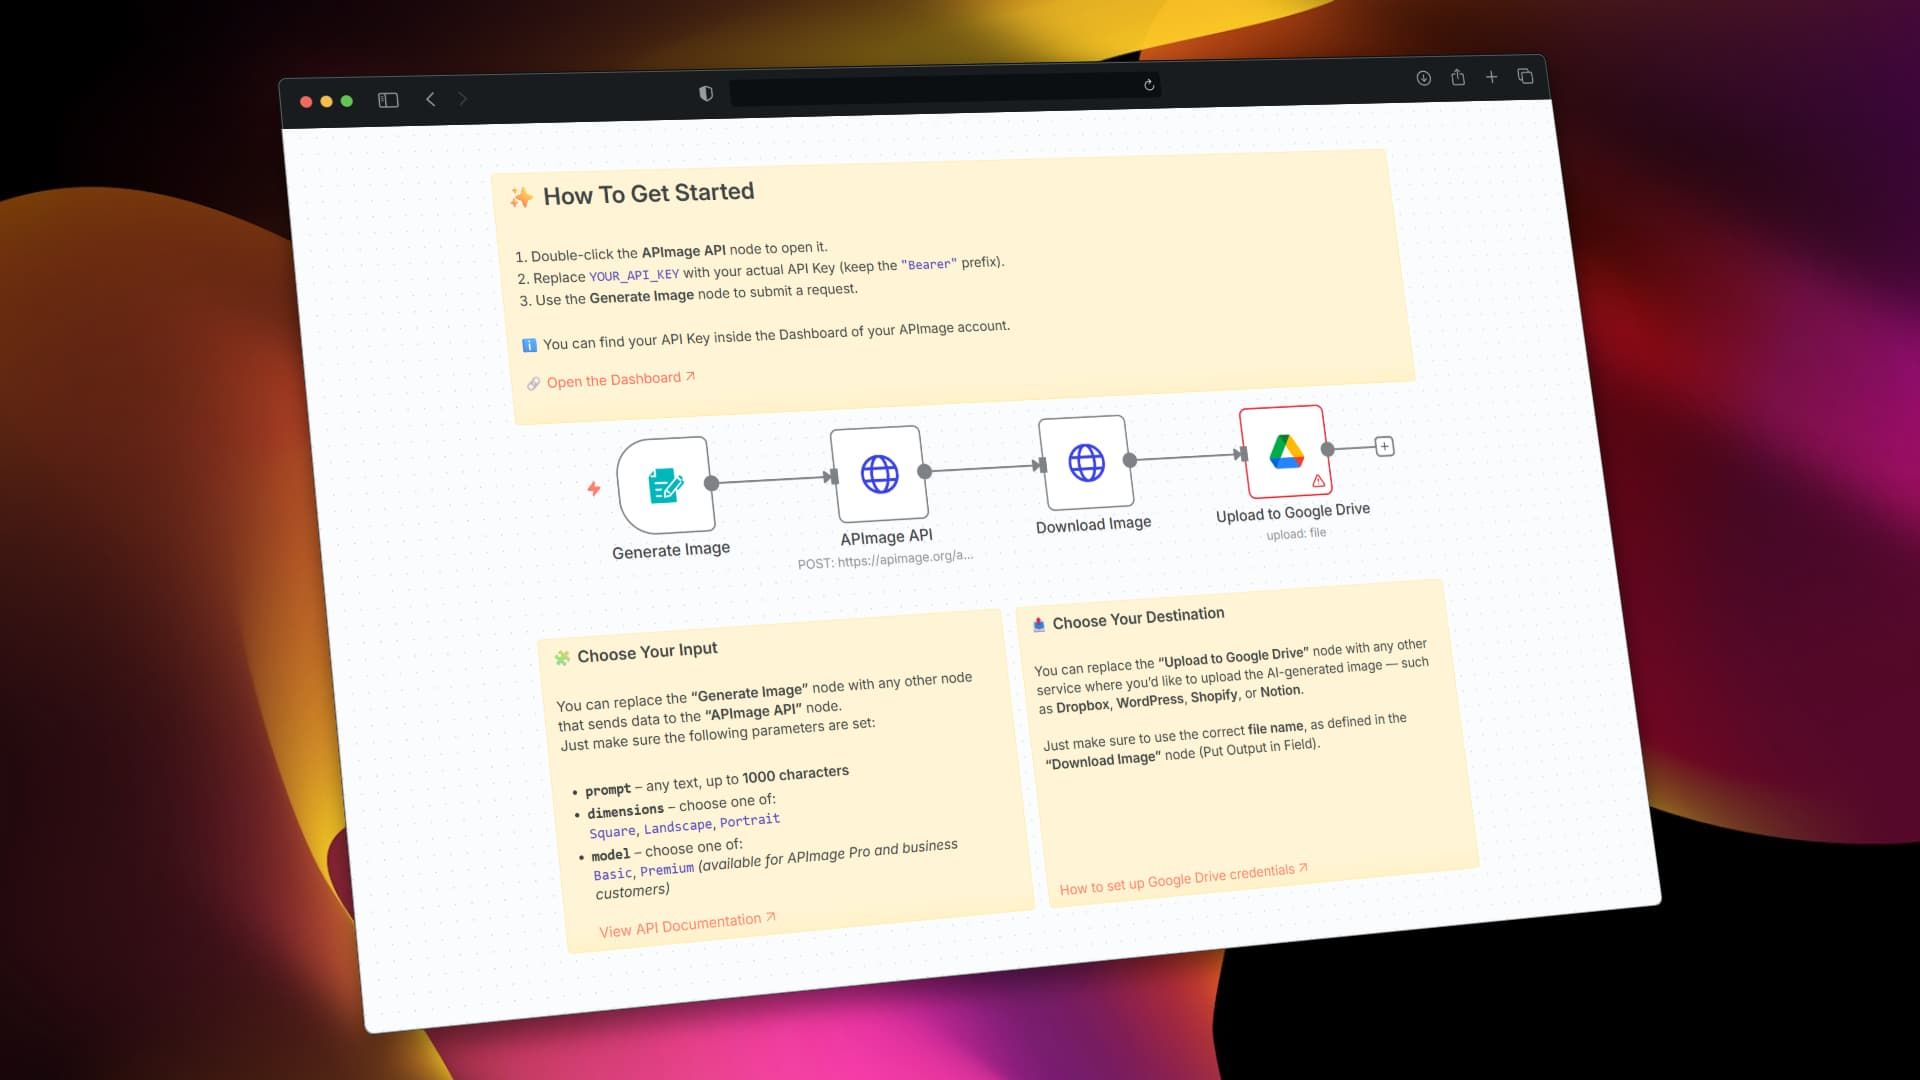
AI Image Generator Workflow
This workflow lets you automatically generate AI images with the APImage API 🡥, download the generated image, and upload it to any serivce you want (e.g., Google Drive, Notion, Social Media, etc.).

🧩 Nodes Overview
1. Generate Image (Trigger)
This node contains the following fields:
- Image Prompt: (text input)
- Dimensions:
Square,Landscape,Portrait - AI Model:
Basic,Premium
This acts as the entry point to your workflow.
It collects input and sends it to the APImage API node.
Note: You can swap this node with any other node that lets you define the parameters shown above.
2. APImage API (HTTP Request)
This node sends a POST request to:
https://apimage.org/api/ai-image-generate
The request body is dynamically filled with values from the first node:
{
  "prompt": "{{ $json['Describe the image you want'] }}",
  "dimensions": "{{ $json['Dimensions'] }}",
  "model": "{{ $json['AI Model'] }}"
}
✅ Make sure to set your API Key in the Authorization header like this:
Bearer YOUR_API_KEY
🔐 You can find your API Key in your APImage Dashboard 🡥
3. Download Image (HTTP Request)
Once the image is generated, this node downloads the image file using the URL returned by the API:
{{ $json.images[0] }}
The image is stored in the output field: generated_image
4. Upload to Google Drive
This node takes the image from the generated_image field and uploads it to your connected Google Drive.
📁 You can configure a different target folder or replace this node with:
- Dropbox
- WordPress
- Notion
- Shopify
- Any other destination
Make sure to pass the correct filename and file field, as defined in the "Download Image" node.
Set up Google Drive credentials 🡥
✨ How To Get Started
- Double-click the APImage API node.
- Replace
YOUR_API_KEYwith your actual key (keepBearerprefix). - Open the Generate Image node and test the form.
🔧 How to Customize
- Replace the Form Trigger with another node if you're collecting data elsewhere (e.g., via Airtable, Notion, Webhook, Database, etc.)
- Modify the Upload node if you'd like to send the image to other tools like Slack, Notion, Email, or an S3 bucket.
📚 API Docs & Resources
🖇️ Node Connections
Generate Image → APImage API → Download Image → Upload to Google Drive
✅ This template is ideal for:
- Content creators automating media generation
- SaaS integrations for AI tools
- Text-to-image pipelines