Back to Templates


Automatically Reply to Customer Emails with Airtable, Gmail, and OpenAI

Introduction
This guide walks you step by step through setting up an automated agent that:
- Receives emails sent by your customers.
- Analyzes the content of the email.
- Generates an appropriate response using an AI model (OpenAI GPT).
- Stores all information (received email, AI response, date, customer email) in Airtable.
- Automatically replies to the customer in the same Gmail thread.
Prerequisites
Before you start, you’ll need:
- A Gmail account connected to n8n.
- An Airtable account.
- An n8n instance (cloud or self-hosted).
- An OpenAI API key.
Prepare the Airtable Base
No need to build everything from scratch — here’s a ready-to-use base you can copy:
👉 Open the Airtable base
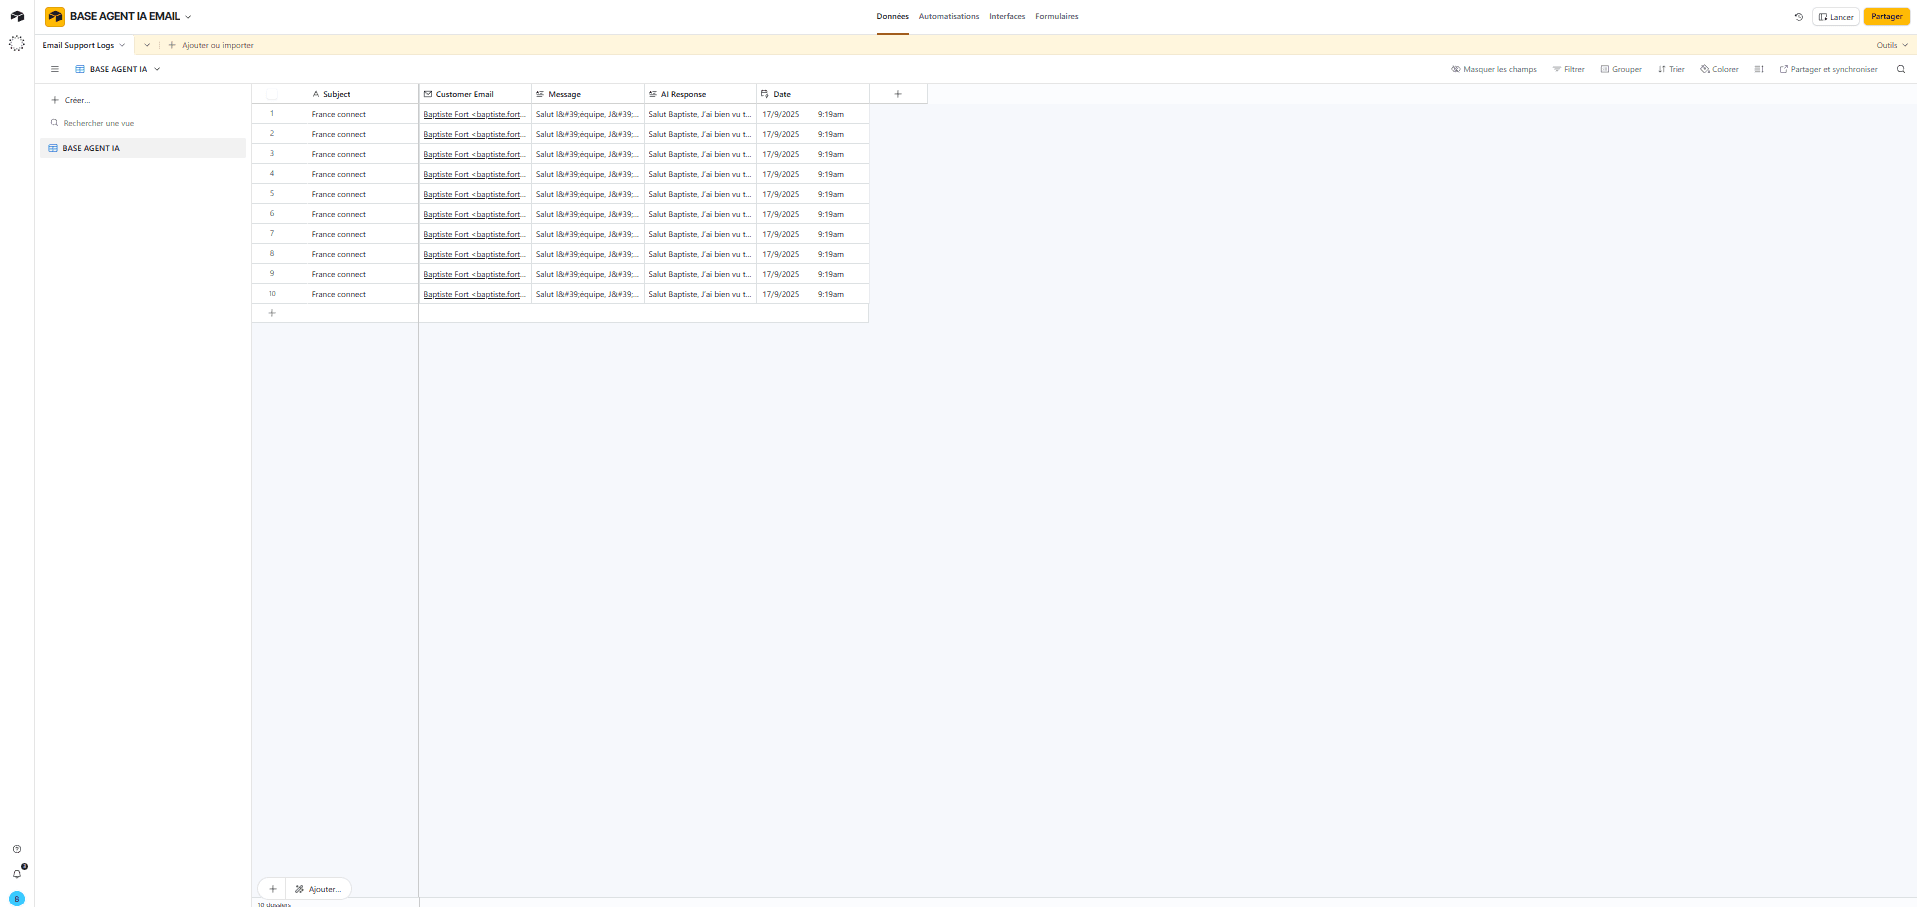
It already contains the following structure:
- Subject (text) → email subject.
- Date (date/time) → date of reception.
- Customer Email (text) → customer’s email address.
- Message (long text) → body of the received email.
- AI Response (long text) → AI-generated reply.
You can reuse it as it is or duplicate it into your Airtable account.
1. Set Up Gmail Trigger in n8n
Alright, now that we have our Airtable base ready, we need to capture customer emails.
That’s the job of the Gmail Trigger. Basically, this node lies in wait inside your inbox, and as soon as a new message arrives… bam, your workflow fires up.
Connect Your Gmail Account
- In n8n, add a Gmail Trigger node.
- Click Credential to connect with and select your Gmail account.
- If you haven’t done it yet, click Add new, connect your Google account, and allow access.
Pro tip: don’t worry, it won’t read your personal emails to gossip — everything stays inside your workflow.
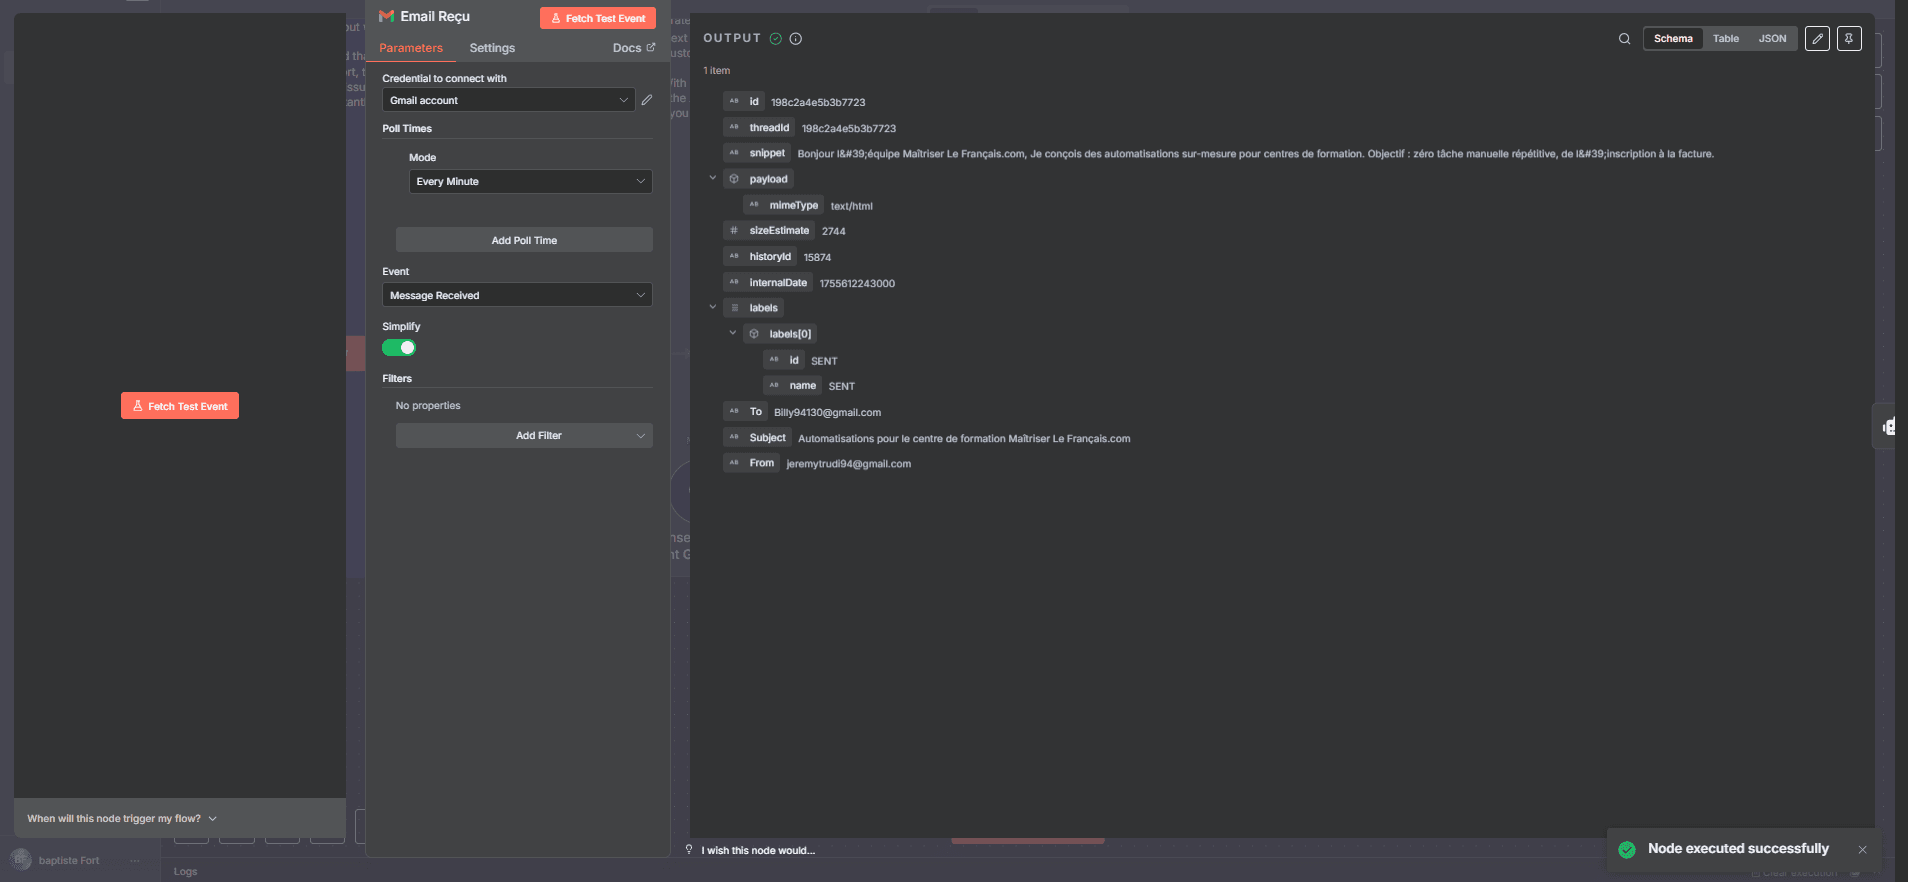
Basic Settings
- Poll Times: select
Every Minute.
→ This way, n8n checks your inbox every minute. - Mode:
Message Received.
→ You want the flow to trigger whenever a customer writes to you. - Event:
Message Received.
→ Same logic, keep it simple. - Simplify: turn it off (
OFF).
→ Why? Because if you enable "Simplify," you only get a stripped-down version of the email. And you want it all: subject, sender, raw message… the full package.
Expected Output
When you execute the node, you should see:
- id: unique identifier of the email.
- threadId: conversation identifier (super useful to reply in the same thread).
- snippet: a short preview of the email (first lines).
- From: your customer’s email address.
- To: your email address.
- Subject: the subject of the email.
- payload: the full body of the email (yep, in base64 — but we’ll handle that later).
And that’s it — your Gmail Trigger is set up. In short, the moment a customer writes “Hey, I have an issue with my account,” your workflow kicks in instantly (well, almost — it checks every minute).
2. Set Up the AI Agent in n8n
After configuring your Gmail Trigger (which captures incoming customer emails), you now need a brain to take over, analyze the email, and draft a reply.
That’s where the AI Agent node comes in.
Its Role
The AI Agent node is used to:
- Read the email content (via the Gmail Trigger).
- Understand the context and tone of the customer.
- Generate a clear, concise, and human-like response.
- Prepare a personalized reply that will later be sent back via Gmail and stored in Airtable.
In short, it’s your 24/7 support colleague, but coded as a bot.
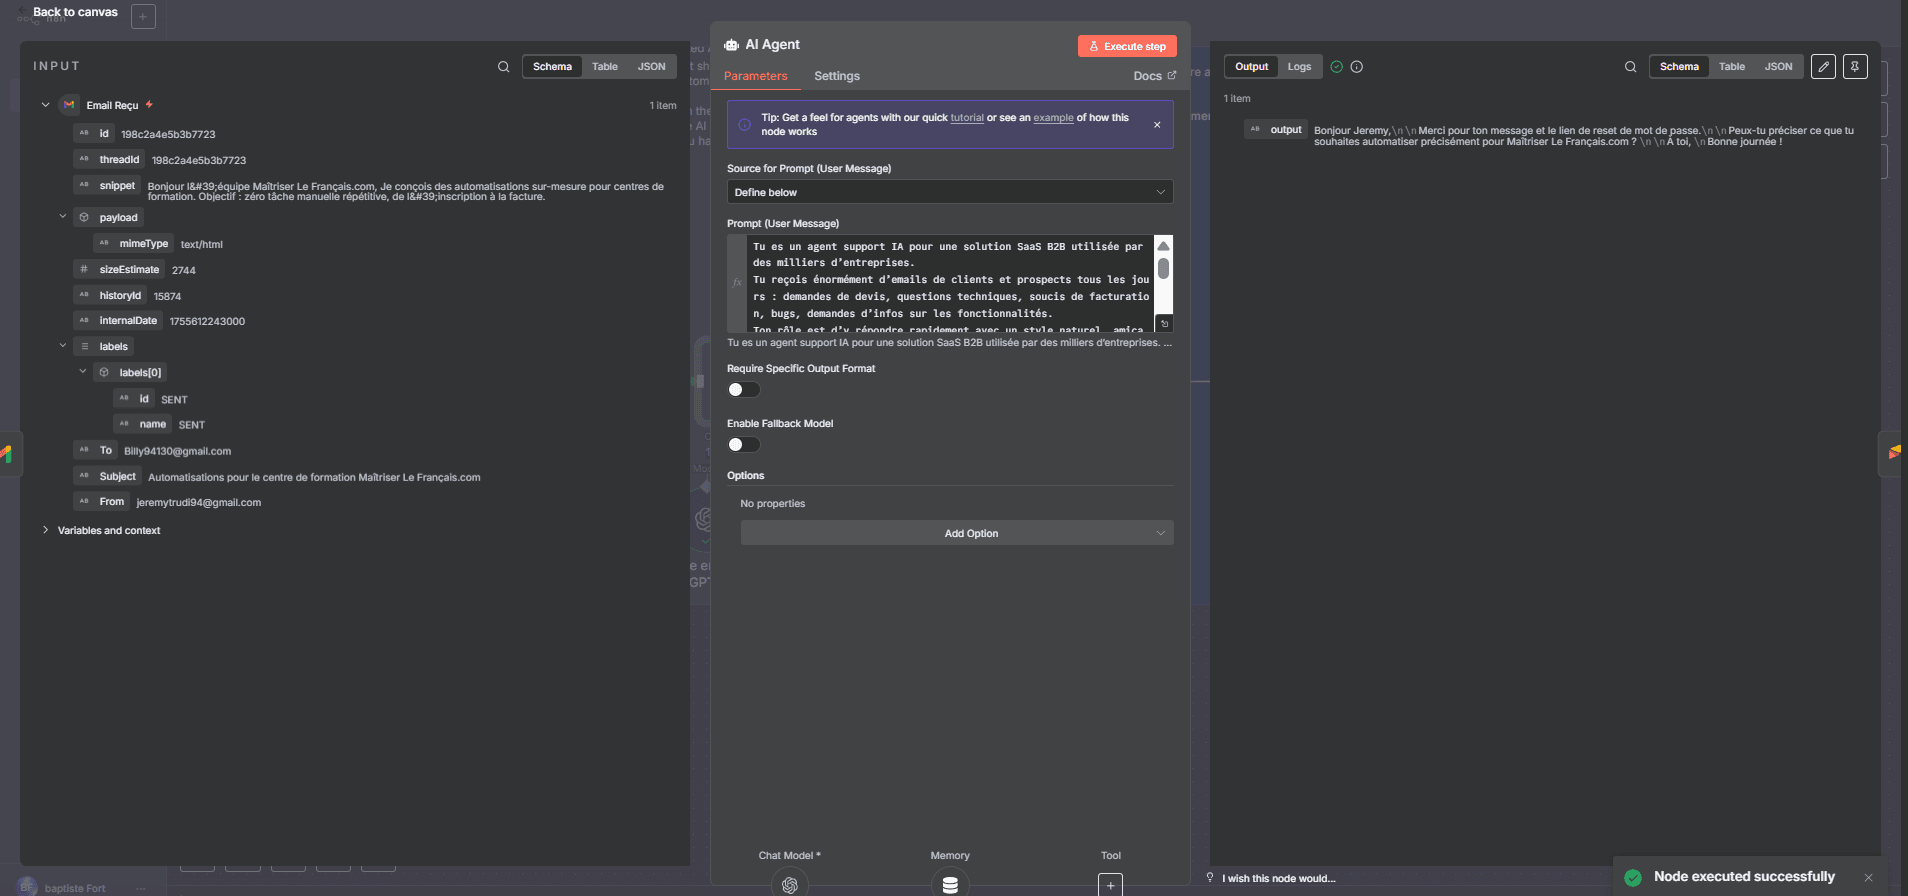
How to Configure It
- Source for Prompt (User Message) → choose
Define below. - Prompt (User Message) → describe your business and role as if you were training an intern.
Example: “You are an AI support agent for a company that sells solar panels. You respond to technical requests, quotes, and customer questions. Your replies must be short, clear, friendly, and precise.” - Chat Model → connect your AI model (e.g. OpenAI GPT-4.1 Mini).
- Memory (optional but recommended) → connect a Conversation Memory node.
→ This allows the AI to retain conversation history and better understand follow-ups.
Expected Output
When you run this node, you should see in the output:
- A field
outputcontaining the automatically generated AI reply. - The text should be short, natural, and adapted to the customer’s tone (casual or formal).
👉 With the Gmail Trigger you capture emails, and with the AI Agent you get a reply ready to send — as if you had written it yourself.
3. Save Emails and Responses in Airtable
Now that your AI Agent generates replies, you need to store them somewhere to keep a clear record of all interactions.
That’s where Airtable comes in.
Quick Reminder
You’ve already copied my ready-to-use Airtable base:
👉 Access the base
This base contains a table Email Support Logs with the following columns:
- Subject
- Date
- Customer Email
- Message
- AI Response
How to Connect Airtable in n8n
- Add an Airtable node right after your AI Agent.
- Under Operation, select
Create. - In Base → choose BASE AGENT IA EMAIL.
- In Table → select Email Support Logs.
Map the Correct Values
Then, link the fields as follows:
- Subject →
{{ $('Email Received').item.json.Subject }} - Customer Email →
{{ $('Email Received').item.json.From }} - Message →
{{ $('Email Received').item.json.snippet }} - AI Response →
{{ $('AI Agent').item.json.output }} - Date →
{{ $now }}
Expected Output
For each new email received:
- Gmail captures the email.
- Your AI drafts the reply.
- All details (email, sender, subject, reply) are automatically stored in your Airtable base.
👉 You now have a fully automated customer support log.
4. Automatically Reply to the Customer in Gmail
Now that you’re storing each interaction in Airtable, it’s time to send your AI’s reply directly back to the customer.
This closes the loop: customer writes → AI replies → everything gets logged in Airtable.
Add the Gmail Reply Node
- Add a Gmail node right after your AI Agent (or after Airtable if you prefer logging before replying).
- Under Operation, select
Reply. - Connect your Gmail account (same credential as your Gmail Trigger).
Configure the Reply
- Thread ID →
{{ $('Email Received').item.json.threadId }}
→ Ensures the reply is sent in the same conversation thread. - To →
{{ $('Email Received').item.json.From }}
→ Customer’s email address. - Subject →
Re: {{ $('Email Received').item.json.Subject }}
→ The "Re:" keeps the continuity of the conversation. - Message Body →
{{ $('AI Agent').item.json.output }}
→ This is the text automatically generated by your AI.
Expected Output
When a customer sends an email:
- Gmail Trigger captures the message.
- The AI Agent generates a tailored reply.
- Airtable logs the full interaction.
- Gmail automatically sends the response in the same conversation thread.
Your customer receives a quick, personalized, and natural reply without you typing a single word.
👉 You now have a complete support agent: listen, analyze, log, reply.
Want to save hours each week? Visit Agence automatisation 0vni.