Back to Integrations
integrationWebhook node
integrationSlack node

Webhook and Slack integration

Save yourself the work of writing custom integrations for Webhook and Slack and use n8n instead. Build adaptable and scalable Development, Core Nodes, and Communication workflows that work with your technology stack. All within a building experience you will love.

How to connect Webhook and Slack

  • Step 1: Set up n8n

  • Step 2: Create a new workflow to connect Webhook and Slack

  • Step 3: Add the first step

  • Step 4: Add the Webhook node

  • Step 5: Authenticate Webhook

  • Step 6: Add the Slack node

  • Step 7: Authenticate Slack

  • Step 8: Configure Webhook and Slack nodes

  • Step 9: Connect Webhook and Slack

  • Step 10: Customize your Webhook and Slack integration

  • Step 11: Save and activate workflow

  • Step 12: Test the workflow

Slack chatbot powered by AI

This workflow offers an effective way to handle a chatbot's functionality, making use of multiple tools for information retrieval, conversation context storage, and message sending. It's a setup tailored for a Slack environment, aiming to offer an interactive, AI-driven chatbot experience.

Note that to use this template, you need to be on n8n version 1.19.4 or later.

Nodes used in this workflow

Popular Webhook and Slack workflows

Slack node
Webhook node
SerpApi (Google Search) node
+3

Slack chatbot powered by AI

This workflow offers an effective way to handle a chatbot's functionality, making use of multiple tools for information retrieval, conversation context storage, and message sending. It's a setup tailored for a Slack environment, aiming to offer an interactive, AI-driven chatbot experience. Note that to use this template, you need to be on n8n version 1.19.4 or later.
Code node
Embeddings OpenAI node
+5

Advanced AI Demo (Presented at AI Developers #14 meetup)

This workflow was presented at the AI Developers meet up in San Fransico on 24 July, 2024. AI workflows Categorize incoming Gmail emails and assign custom Gmail labels. This example uses the Text Classifier node, simplifying this usecase. Ingest a PDF into a Pinecone vector store and chat with it (RAG example) AI Agent example showcasing the HTTP Request tool. We teach the agent how to check availability on a Google Calendar and book an appointment.
Code node
Gmail node
+5

URL and IP lookups through Greynoise and VirusTotal

This n8n workflow serves as a powerful cybersecurity and threat intelligence tool to look up URLs or IP addresses through industry standard threat intelligence vendors. It starts with either a form submission or a webhook trigger, allowing users to input data, URLs or IPs that require analysis. The workflow then splits into two paths depending on whether the input data is an IP or URL. If an IP was given, it sets the ip variable to the IP; however if a URL was given the workflow will perform a DNS lookup using Google Public DNS and sets the ip variable based on the results from Google. The workflow then checks the obtained IP addresses against GreyNoise services, with one branch utilizing GreyNoise RIOT IP Lookup to assess IP reputation and association with known benign services, and the other using GreyNoise IP Context to evaluate potential threats. The results from both GreyNoise services are merged to create a comprehensive analysis which includes the IP, classification (benign, malicious, or unknown), IP location, tags to identify activity or malware, category, and trust level. In parallel, a VirusTotal scan is initiated for the URL/IP to identify if it is malicious. A 5-second wait ensures proper processing, and the workflow subsequently polls the scan result to determine when the analysis is complete. The workflow then summarizes the analysis including the overall security vendor analysis results, blockList analysis, OpenPhish analysis, the URL, and the IP. Finally, the workflow combines the summarized intelligence from both GreyNoise and VirusTotal to provide a thorough analysis of the URL/IP. This summarized intelligence can then be emailed to the user that filled out the form via Gmail or it can be sent to the user via a Slack message. Setting up this workflow may require proper configuration of the form submission or webhook trigger, and ensuring that the GreyNoise and VirusTotal API credentials are correctly integrated. Users should also consider the potential volume of data and API rate limits, as excessive requests could lead to issues. Proper documentation and validation of input data are crucial to ensure accurate and meaningful results in the final report.
Slack node
HTTP Request node
+5

🤖 Advanced Slackbot with n8n

Use case Slackbots are super powerful. At n8n, we have been using them to get a lot done.. But it can become hard to manage and maintain many different operations that a workflow can do. This is the base workflow we use for our most powerful internal Slackbots. They handle a lot from running e2e tests for Github branch to deleting a user. By splitting the workflow into many subworkflows, we are able to handle each command seperately, making it easier to debug as well as support new usecases. In this template, you can find eveything to setup your own Slackbot (and I made it simple, there's only one node to configure 😉). After that, you need to build your commands directly. This bot can create a new thread on an alerts channel and respond there. Or reply directly to the user. It responds for help request to return a help page. It automatically handles unknown commands. It also supports flags and environment variables. For example /cloudbot-test info mutasem --full-info -e env=prod would give you the following info, when calling subworkflow. How to setup Add Slack command and point it up to the webhook. For example. Add the following to the Set config node alerts_channel with alerts channel to start threads on instance_url with this instance url to make it easy to debug slack_token with slack bot token to validate request slack_secret_signature with slack secret signature to validate request help_docs_url with help url to help users understand the commands Build other workflows to call and add them to commands in Set Config. Each command must be mapped to a workflow id with an Execute Workflow Trigger node Activate workflow 🚀 How to adjust Add your own commands. Depending on your need, you might need to lock down who can call this.
Code node
HTML node
Gmail node
+5

Suspicious Login Detection

This n8n workflow is designed for security monitoring and incident response when suspicious login events are detected. It can be initiated either manually from within the n8n UI for testing or automatically triggered by a webhook when a new login event occurs. The workflow first extracts relevant data from the incoming webhook payload, including the IP address, user agent, timestamp, URL, and user ID. It then splits into three parallel processing paths. In the first path, it queries GreyNoise's Community API to retrieve information about the investigated IP address. Depending on the classification and trust level received from GreyNoise, the alert is given a High, Medium, or Low priority. This priority is assigned based on the best practices documentation from GreyNoise on how to apply their data to analysis. Once a priority is assigned, a message is sent to a Slack channel to notify users about the alert. The second path involves fetching geolocation data about the IP address using IP-API's Geolocation API and merging it with data from the UserParser node. This data is then combined with the data obtained from GreyNoise. In the third path, the UserParser node queries the Userparser IP address and user agent lookup API to obtain information about the user's IP and user agent. This data is merged with the IP-API data and GreyNoise data. The workflow then checks if the IP address is considered an unknown threat by examining both the noise and riot fields from GreyNoise. If it is considered an unknown threat, the workflow proceeds to retrieve the last 10 login records for the same user from a Postgres database. If there are any discrepancies in the login information, indicating a new location or device/browser, the user is informed via email. Potential issues when setting up this workflow include ensuring that credentials are correctly entered for GreyNoise and UserParser nodes, and addressing any discrepancies in the data sources that could lead to false positives or negatives in threat detection. Additionally, the usage of hardcoded API keys should be replaced with credentials for security and flexibility. Thorough testing and validation with sample data are crucial to ensure the workflow performs as expected and aligns with security incident response procedures.
Extract from File node
+5

Automate Your RFP Process with OpenAI Assistants

This n8n workflow demonstrates how to automate oftern time-consuming form filling tasks in the early stages of the tendering process; the Request for Proposal document or "RFP". It does this by utilising a company's knowledgebase to generating question-and-answer pairs using Large Language Models. How it works A buyer's RFP is submitted to the workflow as a digital document that can be parsed. Our first AI agent scans and extracts all questions from the document into list form. The supplier sets up an OpenAI assistant prior loaded with company brand, marketing and technical documents. The workflow loops through each of the buyer's questions and poses these to the OpenAI assistant. The assistant's answers are captured until all questions are satisified and are then exported into a new document for review. A sales team member is then able to use this document to respond quickly to the RFP before their competitors. Example Webhook Request curl --location 'https://<n8n_webhook_url>' \ --form 'id="RFP001"' \ --form 'title="BlueChip Travel and StarBus Web Services"' \ --form 'reply_to="[email protected]"' \ --form 'data=@"k9pnbALxX/RFP Questionnaire.pdf"' Requirements An OpenAI account to use AI services. Customising the workflow OpenAI assistants is only one approach to hosting a company knowledgebase for AI to use. Exploring different solutions such as building your own RAG-powered database can sometimes yield better results in terms of control of how the data is managed and cost.
Extract from File node
Respond to Webhook node
Webhook node
+2

Convert an XML file to JSON via webhook call

Who this template is for This template is for everyone who needs to work with XML data a lot and wants to convert it to JSON instead. Use case Many products still work with XML files as their main language. Unfortunately, not every software still supports XML, as many switched to more modern storing languages such as JSON. This workflow is designed to handle the conversion of XML data to JSON format via a webhook call, with error handling and Slack notifications integrated into the process. How this workflow works Triggering the workflow: This workflow initiates upon receiving an HTTP POST request at the webhook endpoint specified in the "POST" node. The endpoint, designated as , can be accessed externally by sending a POST request to that URL. Data routing and processing: Upon receiving the POST request, the Switch node routes the workflow's path based on conditions determined by the content type of the incoming data or any encountered errors. The Extract From File and Edit Fields (Set) nodes manage XML input processing, adapting their actions according to the data's content type. XML to JSON conversion: The XML data extracted from the input is passed through the "XML" node, which performs the conversion process, transforming it into JSON format. Response handling: If the XML-to-JSON conversion is successful, a success response is sent back with a status of "OK" and the converted JSON data. If there are any errors during the XML-to-JSON conversion process, an error response is sent back with a status of "error" and an error message. Error handling: in case of an error during processing, the workflow sends a notification to a Slack channel designated for error reporting. Set up steps Set up your own in the Webhook node. While building or testing a workflow, use a test webhook URL. When your workflow is ready, switch to using the production webhook URL. Set credentials for Slack.
Google Gemini Chat Model node
Slack node
Webhook node

Creating a AI Slack Bot with Google Gemini

This is an example of how we can build a slack bot in a few easy steps Before you can start, you need to o a few things Create a copy of this workflow Create a slack bot Create a slash command on slack and paste the webhook url to the slack command Note Make sure to configure this webhook using a https:// wrapper and don't use the default http://localhost:5678 as that will not be recognized by your slack webhook. Once the data has been sent to your webhook, the next step will be passing it via an AI Agent to process data based on the queries we pass to our agent. To have some sort of a memory, be sure to set the slack token to the memory node. This way you can refer to other chats from the history. The final message is relayed back to slack as a new message. Since we can not wait longer than 3000 ms for slack response, we will create a new message with reference to the input we passed. We can advance this using the tools or data sources for it to be more custom tailored for your company. Usage To use the slackbot, go to slack and click on your set slash command eg /Bob and send your desired message. This will send the message to your endpoint and get return the processed results as the message. If you would like help setting this up, feel free to reach out to [email protected]
Webhook node
Google Calendar node
Slack node

Generate instant google meet links with a slack command

How it works This template uses a slack app to connect with your google calendar, generate an instant google meet link and post it as a message in a slack channel Setup steps Firstly, you'll need to create a slack app Authenticate and connect your slack account Connect and choose the Google calendar you want to generate Google meet links for Customize your slack message Then using a /meet command in slack, you can instantly generate and post your Google meet links
Respond to Webhook node
OpenAI Chat Model node
+5

IT Ops AI SlackBot Workflow - Chat with your knowledge base

Video Demo: Click here to see a video of this workflow in action. Summary Description: The "IT Department Q&A Workflow" is designed to streamline and automate the process of handling IT-related inquiries from employees through Slack. When an employee sends a direct message (DM) to the IT department's Slack channel, the workflow is triggered. The initial step involves the "Receive DMs" node, which listens for new messages. Upon receiving a message, the workflow verifies the webhook by responding to Slack's challenge request, ensuring that the communication channel is active and secure. Once the webhook is verified, the workflow checks if the message sender is a bot using the "Check if Bot" node. If the sender is identified as a bot, the workflow terminates the process to avoid unnecessary actions. If the sender is a human, the workflow sends an acknowledgment message back to the user, confirming that their query is being processed. This is achieved through the "Send Initial Message" node, which posts a simple message like "On it!" to the user's Slack channel. The core functionality of the workflow is powered by the "AI Agent" node, which utilizes the OpenAI GPT-4 model to interpret and respond to the user's query. This AI-driven node processes the text of the received message, generating an appropriate response based on the context and information available. To maintain conversation context, the "Window Buffer Memory" node stores the last five messages from each user, ensuring that the AI agent can provide coherent and contextually relevant answers. Additionally, the workflow includes a custom Knowledge Base (KB) tool (see that tool template here) that integrates with the AI agent, allowing it to search the company's internal KB for relevant information. After generating the response, the workflow cleans up the initial acknowledgment message using the "Delete Initial Message" node to keep the conversation thread clean. Finally, the generated response is sent back to the user via the "Send Message" node, providing them with the information or assistance they requested. This workflow effectively automates the IT support process, reducing response times and improving efficiency. To quickly deploy the Knowledge Ninja app in Slack, use the app manifest below and don't forget to replace the two sample urls: { "display_information": { "name": "Knowledge Ninja", "description": "IT Department Q&A Workflow", "background_color": "#005e5e" }, "features": { "bot_user": { "display_name": "IT Ops AI SlackBot Workflow", "always_online": true } }, "oauth_config": { "redirect_urls": [ "Replace everything inside the double quotes with your slack redirect oauth url, for example: https://n8n.domain.com/rest/oauth2-credential/callback" ], "scopes": { "user": [ "search:read" ], "bot": [ "chat:write", "chat:write.customize", "groups:history", "groups:read", "groups:write", "groups:write.invites", "groups:write.topic", "im:history", "im:read", "im:write", "mpim:history", "mpim:read", "mpim:write", "mpim:write.topic", "usergroups:read", "usergroups:write", "users:write", "channels:history" ] } }, "settings": { "event_subscriptions": { "request_url": "Replace everything inside the double quotes with your workflow webhook url, for example: https://n8n.domain.com/webhook/99db3e73-57d8-4107-ab02-5b7e713894ad", "bot_events": [ "message.im" ] }, "org_deploy_enabled": false, "socket_mode_enabled": false, "token_rotation_enabled": false } }
Code node
Jira Software node
Slack node
Webhook node
HTTP Request node

Notify User in Slack of Quarantined Email and Create Jira Ticket if Opened

This n8n workflow serves as an incident response and notification system for handling potentially malicious emails flagged by Sublime Security. It begins with a Webhook trigger that Sublime Security uses to initiate the workflow by POSTing an alert. The workflow then extracts message details from Sublime Security using an HTTP Request node, based on the provided messageId, and subsequently splits into two parallel paths. In the first path, the workflow looks up a Slack user by email, aiming to find the recipient of the email that triggered the alert. If a user is found in Slack, a notification is sent to them, explaining that they have received a potentially malicious email that has been quarantined and is under investigation. This notification includes details such as the email's subject and sender. The second path checks whether the flagged email has been opened by inspecting the read_at value from Sublime Security. If the email was opened, the workflow prepares a table summarizing the flagged rules and creates a corresponding issue in Jira Software. The Jira issue contains information about the email, including its subject, sender, and recipient, along with the flagged rules. Issues that someone might encounter when setting up this workflow for the first time include potential problems with the Slack user lookup if the user information is not available or if Slack API integration is not configured correctly. Additionally, the issue creation in Jira Software may not work as expected, as indicated by the note that mentions a need for possible node replacement. Thorough testing and validation with sample data from Sublime Security alerts can help identify and resolve any potential issues during setup.
Slack node
Webhook node
HubSpot node
Lemlist node
Dropcontact node

Lonescale Hiring Signal - Send leads to lemlist and Hubspot

Job offers are a goldmine of information. Use them to boost your outreach results. They'll give you: more context to personalize your messaging a steady flow of new leads the right timing to contact your lead
Slack node
Webhook node
Zendesk node
+2

Sync Zendesk tickets to Slack thread

This workflow creates a Slack thread when a new ticket is created in Zendesk. Subsequent comments on the ticket in Zendesk are added as replies to the thread in Slack. Prerequisites Zendesk account and Zendesk credentials. Slack account and Slack credentials. Slack channel to create threads in. How it works The workflow listens for new tickets in Zendesk. When a new ticket is created, the workflow creates a new thread/message in Slack. The Slack thread ID is then saved in one of the ticket's fields called "Slack thread ID". The next time a comment is added to the ticket, the workflow retrieves the Slack thread ID from the ticket's field and adds the comment to the thread/message in Slack as a reply. Setup This workflow requires that you set up a webhook in Zendesk. To do so, follow the steps below: In the workflow, open the On new Zendesk ticket node and copy the webhook URL. In Zendesk, navigate to Admin Center > Apps and integrations > Webhooks > Actions > Create Webhook. Add all the required details which can be retrieved from the On new Zendesk ticket node. The webhook URL gets added to the “Endpoint URL” field, and the “Request method” should match what is shown in n8n. Save the webhook. In Zendesk, navigate to Admin Center > Objects and rules > Business rules > Triggers > Add trigger. Give trigger a name such as “New tickets”. Under “Conditions” in “Meet ALL of the following conditions”, add “Status is New”. Under “Actions”, select “Notify active webhook” and select the webhook you created previously. In the JSON body, add the following: { "id": "{{ticket.id}}", "comment": "{{ticket.latest_comment_html}}" } Save the Zendesk trigger. You will also need to set up a field in Zendesk to store the Slack thread ID. To do so, follow the steps below: In Zendesk, navigate to Admin Center > Objects and rules > Tickets > Fields > Add field. Use the text field option and give the field a name such as “Slack thread ID”. Save the field. In n8n, open the Update ticket node and select the field you created in Zendesk.
HTTP Request node
Slack node
Webhook node

Replicate Line Items on New Deal in HubSpot and notify with Slack

Replicate Line Items on New Deal in HubSpot Workflow Use Case This workflow solves the problem of manually copying line items from one deal to another in HubSpot, reducing manual work and minimizing errors. What this workflow does Triggers** upon receiving a webhook with deal IDs. Retrieves** the IDs of the won and created deals. Fetches** line items associated with the won deal. Extracts** product SKUs from the retrieved line items. Fetches** product details based on SKUs. Creates** new line items for the created deal and associates them. Sends** a Slack notification with success details. Step up steps Create a HubSpot Deal Workflow 1.1 Set up your trigger (ex: when deal stage = Won) 1.2 Add step : Create Record (deal) 1.3 Add Step : Send webhook. The webhook should be a Get to your n8n first trigger. Set two query parameter : deal_id_won as the Record ID of the deal triggering the HubSpot Workflow deal_id_create as the Record ID of the deal created above. Click Insert Data -> The created object Set up your HubSpot App token in HubSpot -> Settings -> Integration -> Private Apps Set up your HubSpot Token integration using the predefined model. Set up your Slack connection Add an error Workflow to monitor errors
Slack node
Webhook node
GraphQL node

Get contributors information from GitHub in Slack

Get your contributors GitHub information with a slash command in your Slack Workspace.
Clearbit node
Webhook node
Slack node

Enrich new Discourse members with Clearbit then notify in Slack

Who is this template for? This workflow template is designed for Sales and Customer Success professionals seeking alerts when potential high-value users, prospects, or existing customers register for a Discourse community. Leveraging Clearbit, it retrieves enriched data for the new member to assess their value. Example result in Slack How it works Each time a new member is created in Discourse, the workflow runs (powered by Discourse's native Webhooks feature). After filtering out popular private email accounts, we run the member's email through Clearbit to fetch available information on the member as well as their organization. If the enriched data meets certain criteria, we send a Slack message to a channel. This message has a few quick actions: Open LinkedIn profile and Email member Set up instructions Overview is below. Watch this 🎥 quick set up video for detailed instructions on how to get the template running, as well as how to customize it. Complete the Set up credentials step when you first open the workflow. You'll need a Discourse (admin user), Clearbit, and Slack account. Set up the Webhook in Discourse, linking the On new Discourse user Trigger with your Discourse community. Set the correct channel to send to in the Post message in channel step After testing your workflow, swap the Test URL to Production URL in Discourse and activate your workflow Template was created in n8n v1.29.1

Build your own Webhook and Slack integration

Create custom Webhook and Slack workflows by choosing triggers and actions. Nodes come with global operations and settings, as well as app-specific parameters that can be configured. You can also use the HTTP Request node to query data from any app or service with a REST API.

Slack supported actions

Archive
Archives a conversation
Close
Closes a direct message or multi-person direct message
Create
Initiates a public or private channel-based conversation
Get
Get information about a channel
Get Many
Get many channels in a Slack team
History
Get a conversation's history of messages and events
Invite
Invite a user to a channel
Join
Joins an existing conversation
Kick
Removes a user from a channel
Leave
Leaves a conversation
Member
List members of a conversation
Open
Opens or resumes a direct message or multi-person direct message
Rename
Renames a conversation
Replies
Get a thread of messages posted to a channel
Set Purpose
Sets the purpose for a conversation
Set Topic
Sets the topic for a conversation
Unarchive
Unarchives a conversation
Get
Get Many
Get & filters team files
Upload
Create or upload an existing file
Delete
Get Permalink
Search
Send
Update
Add
Adds a reaction to a message
Get
Get the reactions of a message
Remove
Remove a reaction of a message
Add
Add a star to an item
Delete
Delete a star from an item
Get Many
Get many stars of autenticated user
Get
Get information about a user
Get Many
Get a list of many users
Get User's Profile
Get a user's profile
Get User's Status
Get online status of a user
Update User's Profile
Update a user's profile
Create
Disable
Enable
Get Many
Update

Webhook and Slack integration details

integrationWebhook node
Webhook

Webhooks are automatic notifications that apps send when something occurs. They are sent to a certain URL, which is effectively the app's phone number or address, and contain a message or payload. Polling is nearly never quicker than webhooks, and it takes less effort from you.

Use case

Save engineering resources

Reduce time spent on customer integrations, engineer faster POCs, keep your customer-specific functionality separate from product all without having to code.

Learn more

FAQs

  • Can Webhook connect with Slack?

  • Can I use Webhook’s API with n8n?

  • Can I use Slack’s API with n8n?

  • Is n8n secure for integrating Webhook and Slack?

  • How to get started with Webhook and Slack integration in n8n.io?

Looking to integrate Webhook and Slack in your company?

Over 3000 companies switch to n8n every single week

Why use n8n to integrate Webhook with Slack

Build complex workflows, really fast
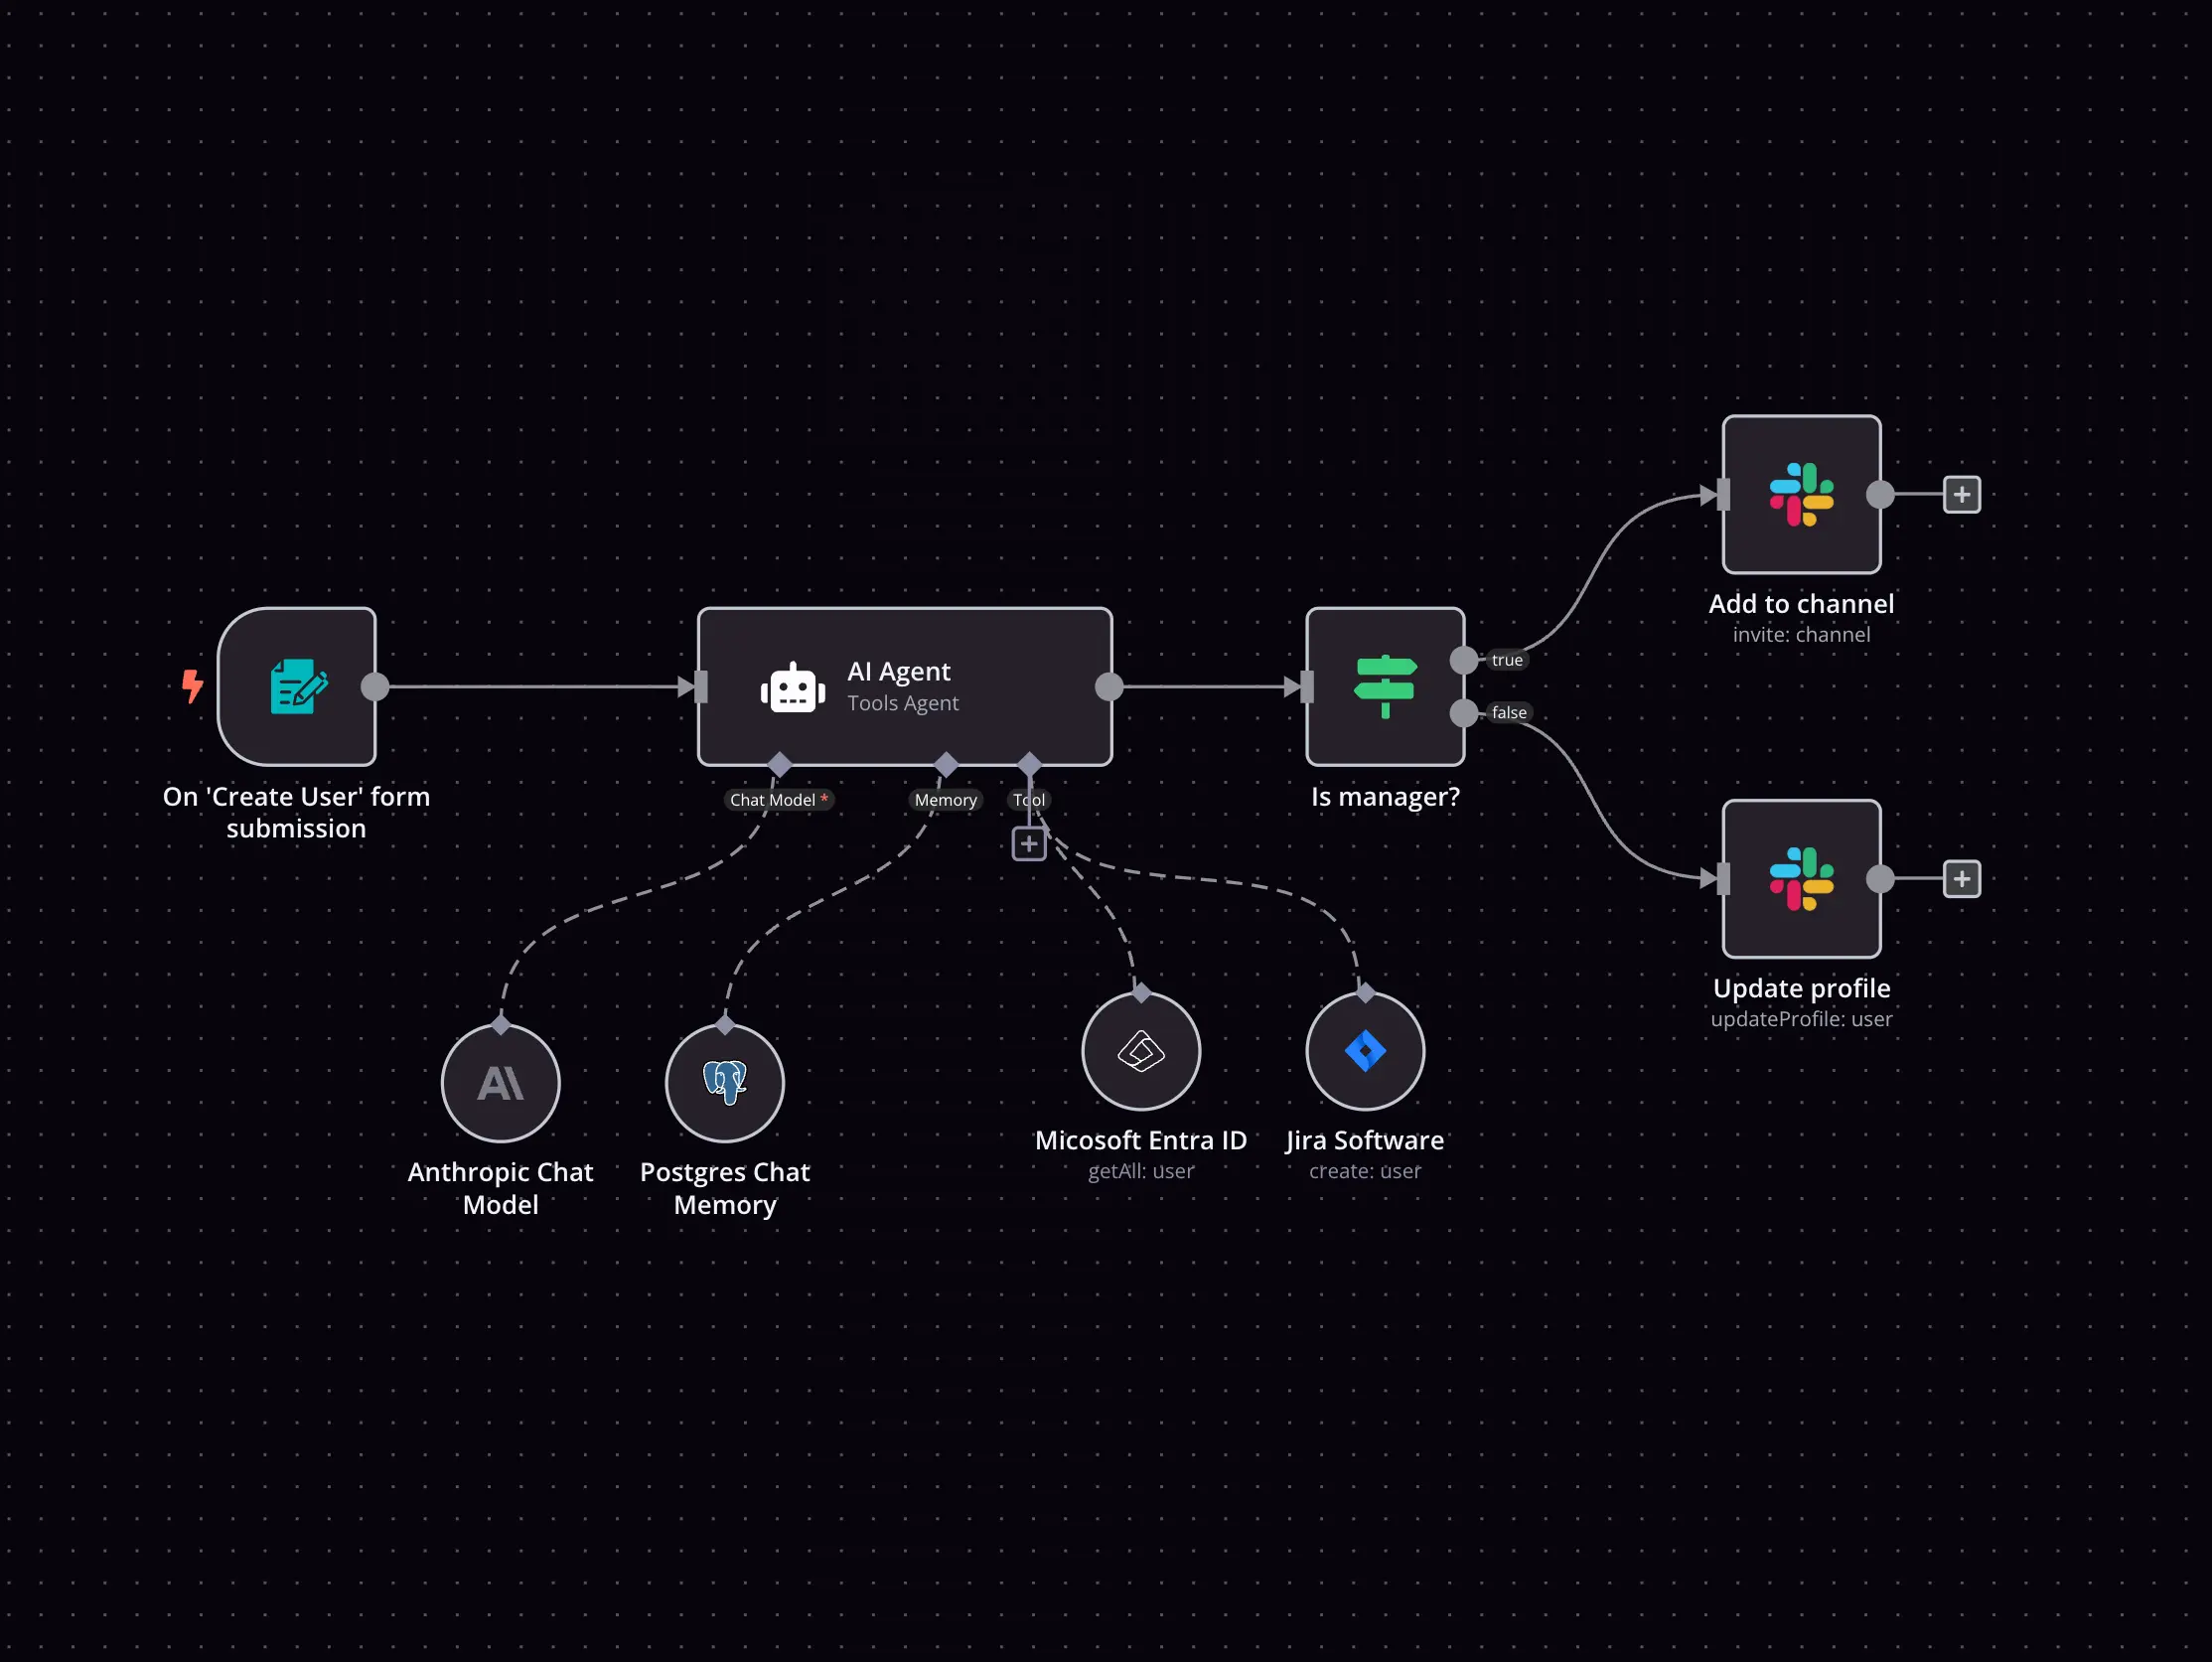
Build complex workflows, really fast

Handle branching, merging and iteration easily.
Pause your workflow to wait for external events.

Code when you need it, UI when you don't

Simple debugging

Your data is displayed alongside your settings, making edge cases easy to track down.

Use templates to get started fast

Use 1000+ workflow templates available from our core team and our community.

Reuse your work

Copy and paste, easily import and export workflows.

Implement complex processes faster with n8n

red iconyellow iconred iconyellow icon