Back to integrations
Wordpress and OpenAI integration
Save yourself the work of writing custom integrations for Wordpress and OpenAI and use n8n instead. Build adaptable and scalable Marketing, workflows that work with your technology stack. All within a building experience you will love.


How to connect Wordpress and OpenAI
Create a new workflow and add the first step
In n8n, click the "Add workflow" button in the Workflows tab to create a new workflow. Add the starting point – a trigger on when your workflow should run: an app event, a schedule, a webhook call, another workflow, an AI chat, or a manual trigger. Sometimes, the HTTP Request node might already serve as your starting point.

Popular ways to use the Wordpress and OpenAI integration
Write a WordPress post with AI (starting from a few keywords)
🔍🛠️Generate SEO-optimized WordPress content with AI powered perplexity research
Automate SEO-Optimized WordPress posts with AI & Google Sheets
Automate content generator for WordPress with DeepSeek R1
Publish WordPress posts to social media X, Facebook, LinkedIn, Instagram with AI
Automated content generation & publishing - Wordpress
Build your own Wordpress and OpenAI integration
Create custom Wordpress and OpenAI workflows by choosing triggers and actions. Nodes come with global operations and settings, as well as app-specific parameters that can be configured. You can also use the HTTP Request node to query data from any app or service with a REST API.
Wordpress supported actions
Create
Create a post
Get
Get a post
Get Many
Get many posts
Update
Update a post
Create
Create a page
Get
Get a page
Get Many
Get many pages
Update
Update a page
Create
Create a user
Get
Get a user
Get Many
Get many users
Update
Update a user
OpenAI supported actions
Message a Model
Generate a model response with GPT 3, 4, 5, etc. using Responses API
Classify Text for Violations
Check whether content complies with usage policies
Analyze Image
Take in images and answer questions about them
Generate an Image
Creates an image from a text prompt
Edit Image
Edit an image
Generate Audio
Creates audio from a text prompt
Transcribe a Recording
Transcribes audio into text
Translate a Recording
Translates audio into text in English
Delete a File
Delete a file from the server
List Files
Returns a list of files that belong to the user's organization
Upload a File
Upload a file that can be used across various endpoints
Create
Create a conversation
Get
Get a conversation
Remove
Remove a conversation
Update
Update a conversation
Generate
Creates a video from a text prompt
Wordpress and OpenAI integration details
OpenAI
OpenAI, the creator of ChatGPT, offers a range of powerful models including GPT-3, DALL·E, and Whisper. Leverage these models to build AI-powered workflows.
Related categories
Other integrations with Wordpress


Other integrations with OpenAI


Wordpress and OpenAI integration tutorials
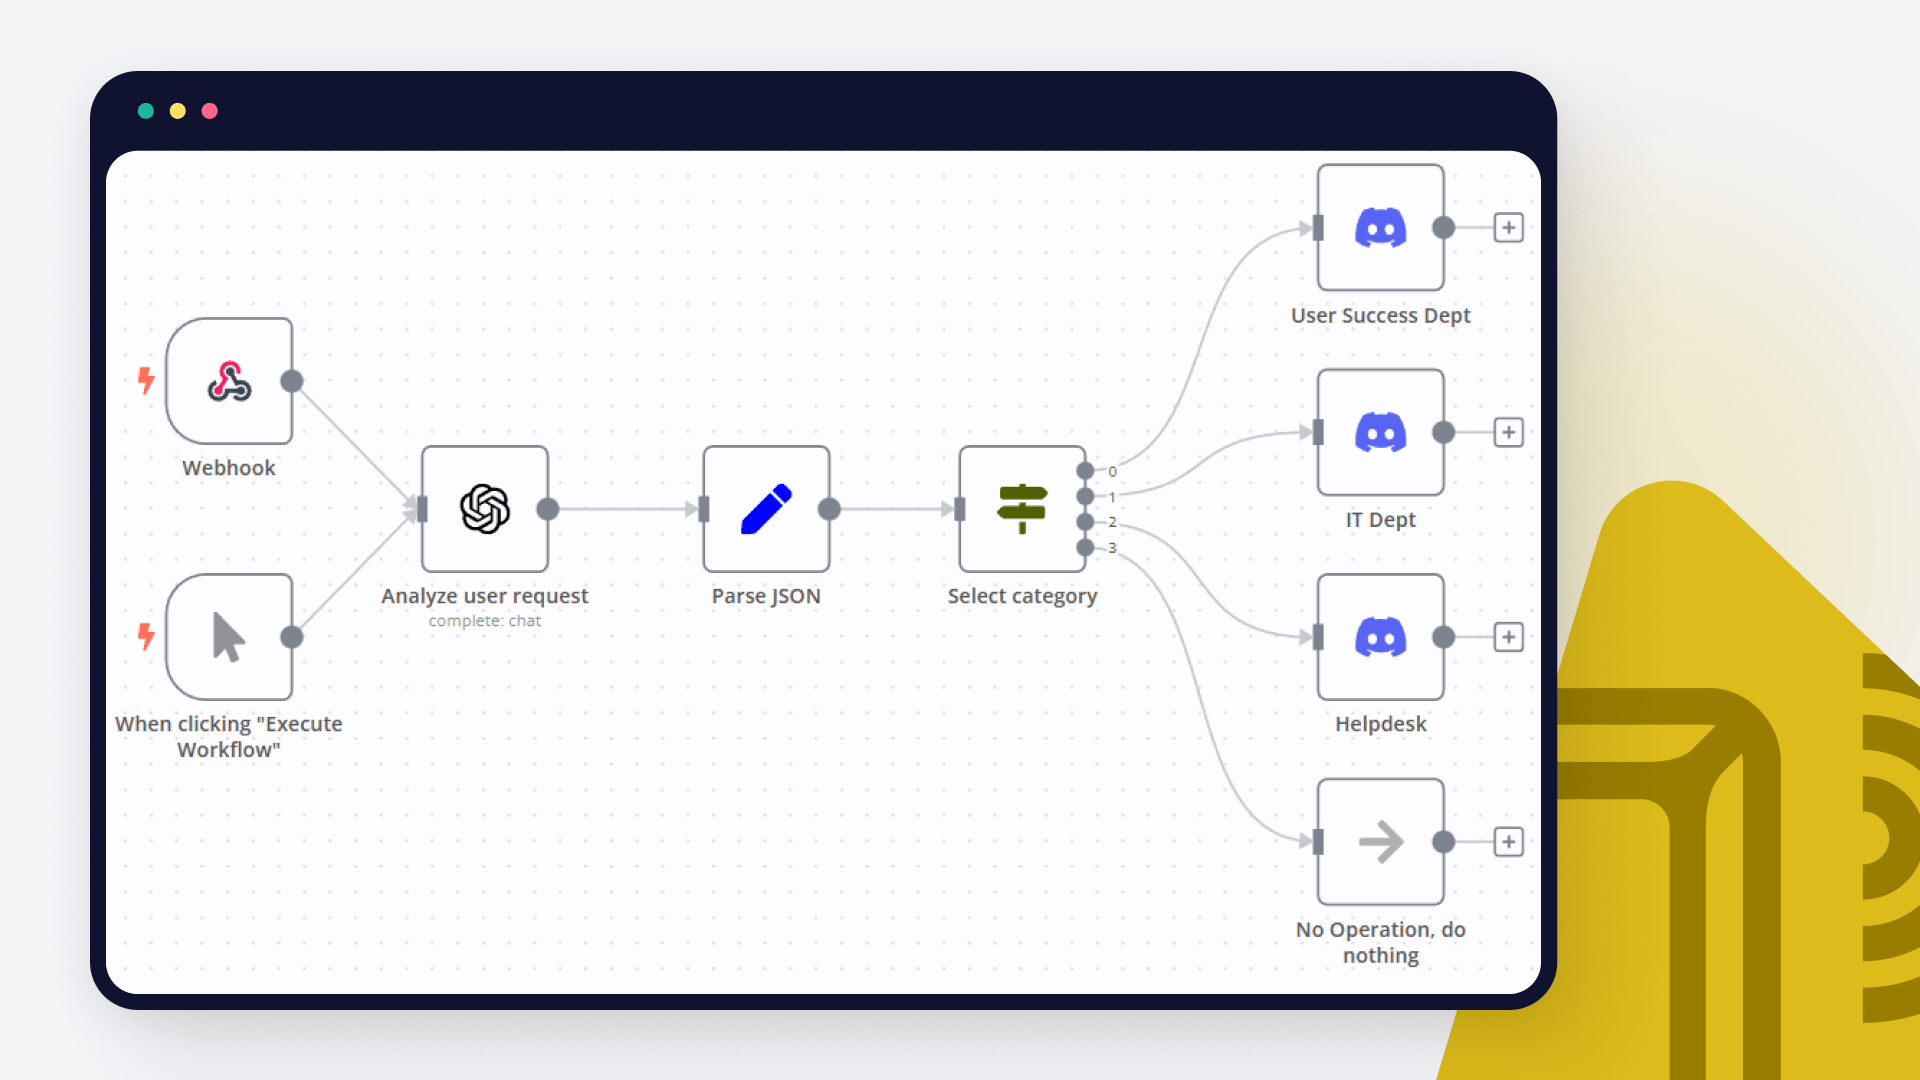
How to create a ChatGPT Discord bot
In this tutorial, we dive deep into how to create an AI bot for analyzing user requests and automating notifications in different Discord channels. Read on!
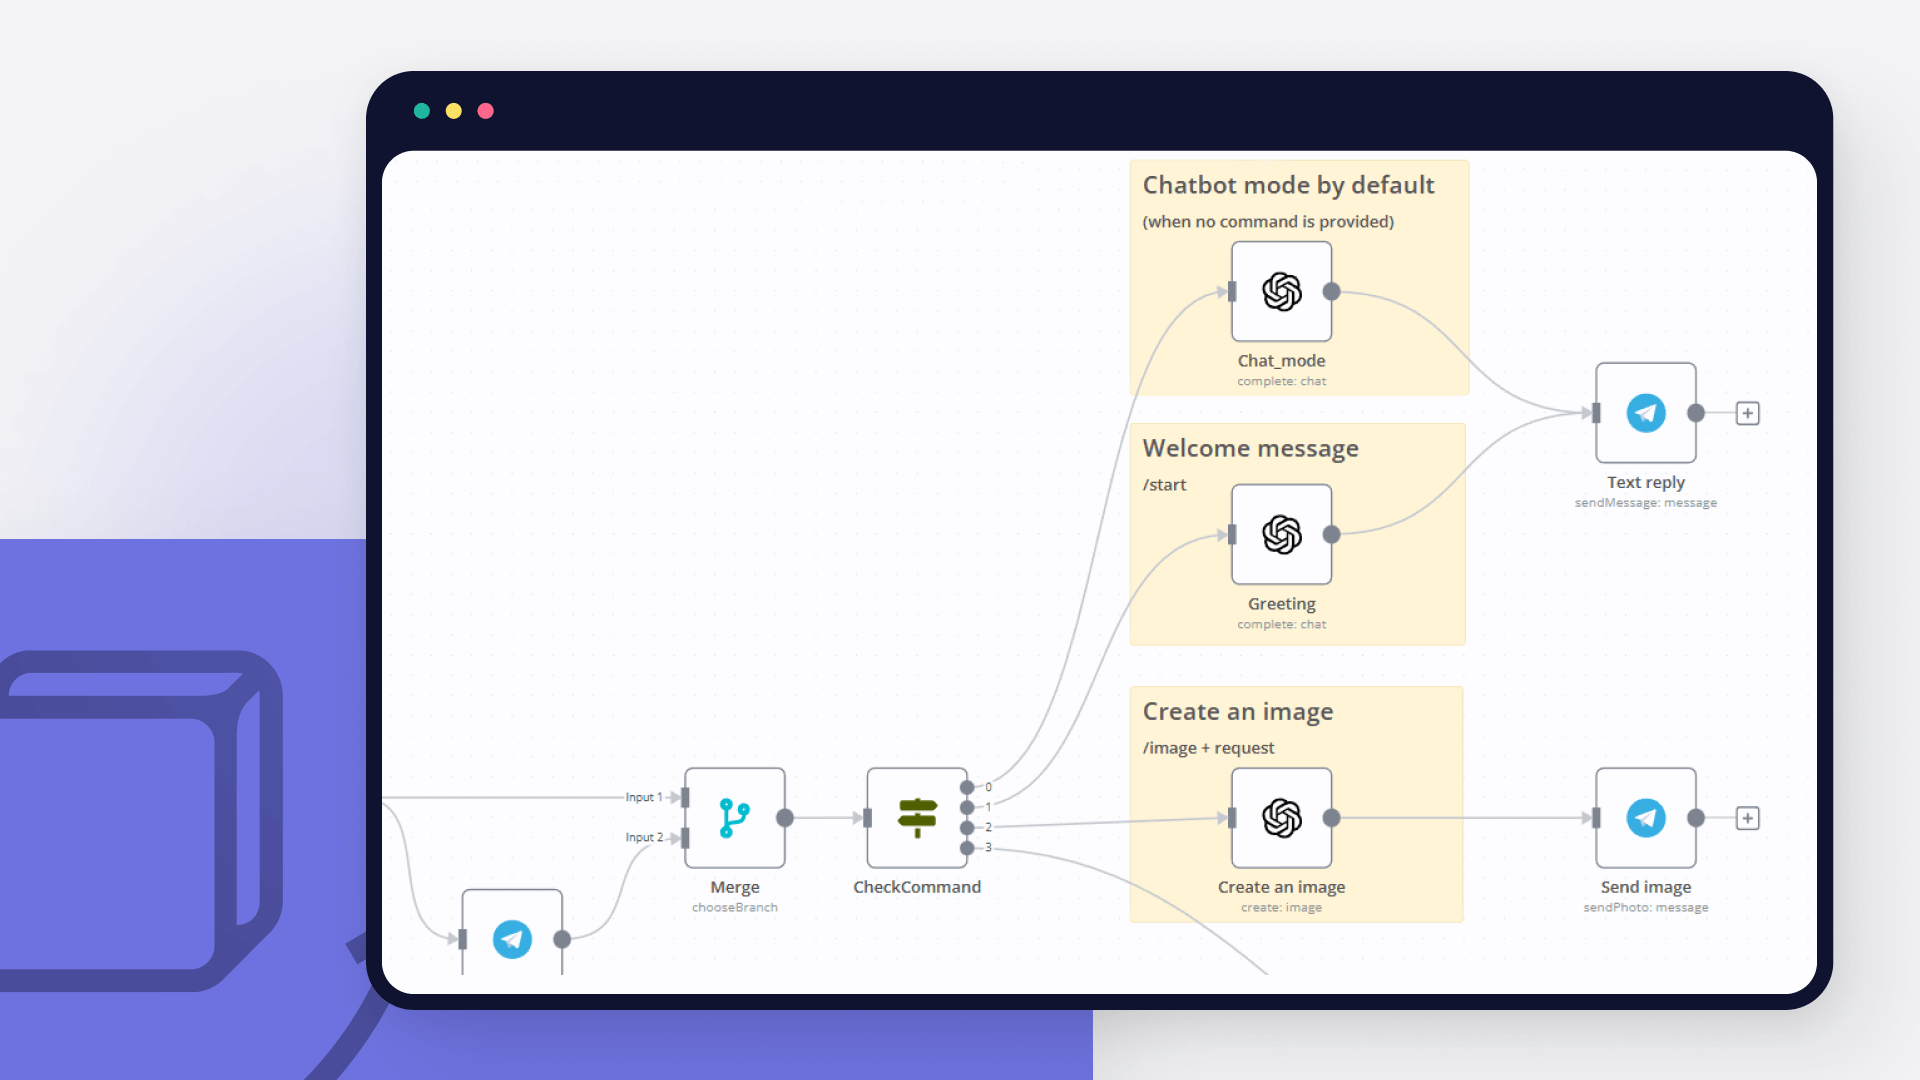
How to create an AI bot in Telegram
Learn how to create an AI chatbot for Telegram with our easy-to-follow guide. Ideal for users who are interested in exploring the realm of bot development without coding.

How to use OpenAI node with n8n to automate your workflows
Learn how to use OpenAI node together with n8n to automate your workflows – discover these 6 existing automation ideas!

How to get started with ChatGPT in your n8n projects: 5 simple workflows
Learn how to connect n8n with ChatGPT and effectively use this chatbot. Prompt engineering and prompt chaining is the trick!

How to create an AI-driven tweet generator bot in 10 minutes
Lacking time or inspiration for your tweets? Then leverage OpenAI and n8n to generate tweets for you and store them in Airtable for further review.
FAQs
FAQ
Can Wordpress connect with OpenAI?
Can I use Wordpress’s API with n8n?
Can I use OpenAI’s API with n8n?
Is n8n secure for integrating Wordpress and OpenAI?
How to get started with Wordpress and OpenAI integration in n8n.io?
Need help setting up your Wordpress and OpenAI integration?
Discover our latest community's recommendations and join the discussions about Wordpress and OpenAI integration.

How to define AI-powered Extra Workflow Inputs in AI tools?
Artem
Describe the question I need to pass to the tool some data from the AI Agent. Like, “task name” and “task tags” to create a task via Custom Workflow Tool. So I don’t know what to refer to in the Extra Inputs. Because th…

The prompt is not being executed
sérgio eduardo floresta filho
Hello! My goal is to use Google Forms to collect information from my clients and then use n8n to automate the processing of this information. My workflow involves: Collecting data through Google Forms. Using n8n to re…

OpenAI not receicving JSON data from previous node
Andrew adawdad
Describe the problem/error/question Im currently using the openAI node to send a text message to the system. I am sending the previous nodes JSON data, but the openai response says that im only sending {{ $json }} instea…

Help with google sheets read node
PinkFloyd
Hi all, I am struggling with one part of my personal finance workflow where I want n8n to read a large table from Google Sheets and then feed all of it to an OpenAI node. I already set it up but can’t figure out how to f…

New openAi Web search
Steve Warburton
Is this available to n8n ? As far as I can see it’s just ( for now ) ChatGPT
The world's most popular workflow automation platform for technical teams including


Why use n8n to integrate Wordpress with OpenAI
Build complex workflows, really fast
