Back to Templates


Overview
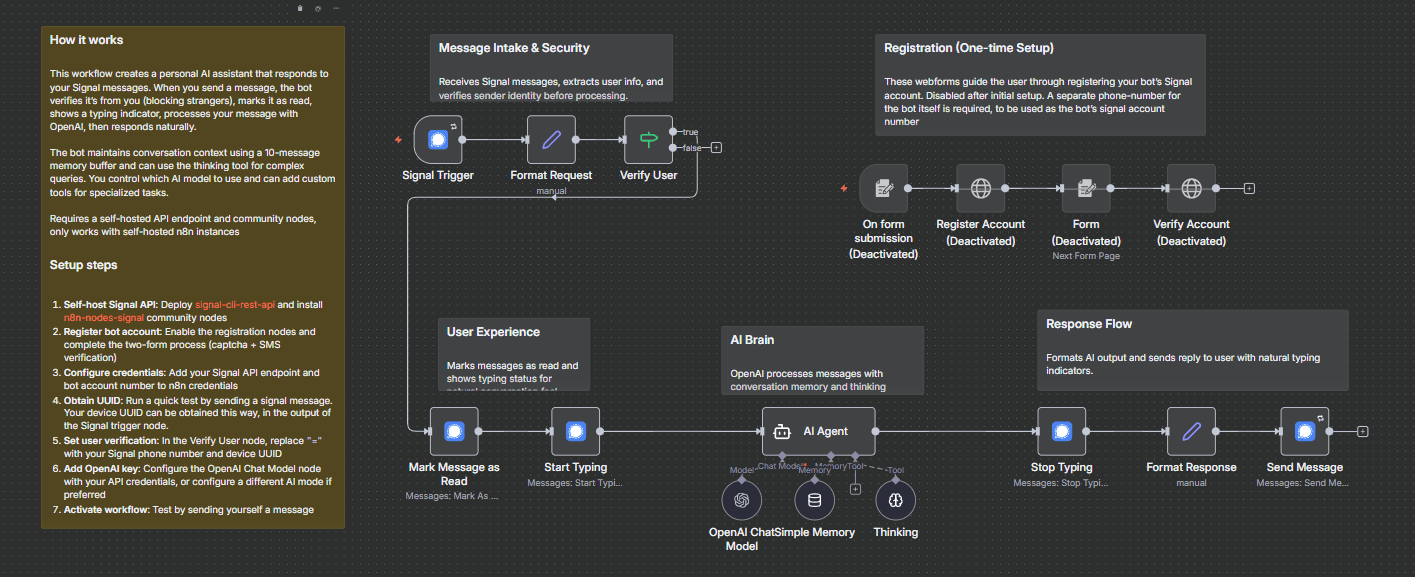
This workflow streamlines the process of setting up a chat-bot using the Signal Messager API.
What this is for
Chat-bot applications have become very popular on Whatsapp and Telegram. However, security conscious people may be hesitant to connect their AI agents to these applications. Compared to Whatsapp and Telegram, the Signal messaging app is more secure and end-to-end encrypted by default. In part because of this, it is more difficult to create a chat-bot application in this app. However, this is still possible to do if you host your own Signal API endpoint.
This workflow requires the installation of a community-node package. Some additional setup for the locally hosted Signal API endpoint is also necessary. As such, it will only work with self-hosted instances of n8n.
You may use any AI model you wish for this chat-bot, and connect different tools and APIs depending on your use-case.
How to setup
Step 1: Setup Rest API
Before implementing this workflow, you must setup a local Signal Client Rest API.
- This can be done using a docker container based on this project: bbernhard/signal-cli-rest-api.
version: "3"
services:
  signal-cli-rest-api:
    image: bbernhard/signal-cli-rest-api:latest
    environment:
      - MODE=normal #supported modes: json-rpc, native, normal
      #- AUTO_RECEIVE_SCHEDULE=0 22 * * * #enable this parameter on demand (see description below)
    ports:
      - "8080:8080" #map docker port 8080 to host port 8080.
    volumes:
      - "./signal-cli-config:/home/.local/share/signal-cli" #map "signal-cli-config" folder on host system into docker container. the folder contains the password and cryptographic keys when a new number is registered
- After starting the docker-container, you will be able to interact with a local Signal client over a Rest API at http://localhost:8080 (by default, this setting can be modified in the docker-compose file).
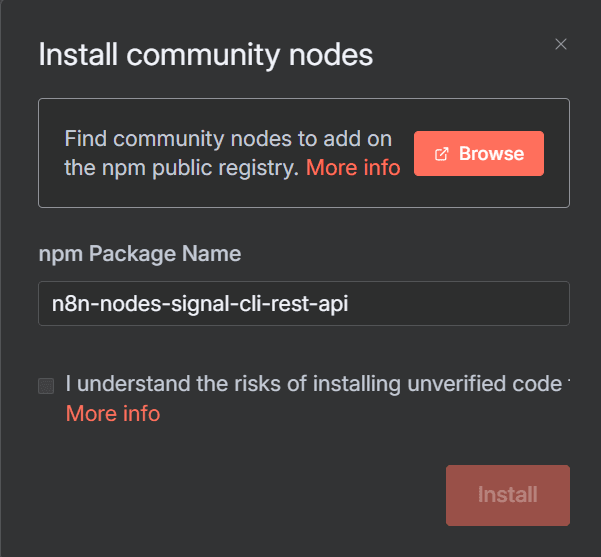
Step 2: Install Node Package
- This workflow requires the community-node package developed by ZBlaZe: n8n-nodes-signal-cli-rest-api.
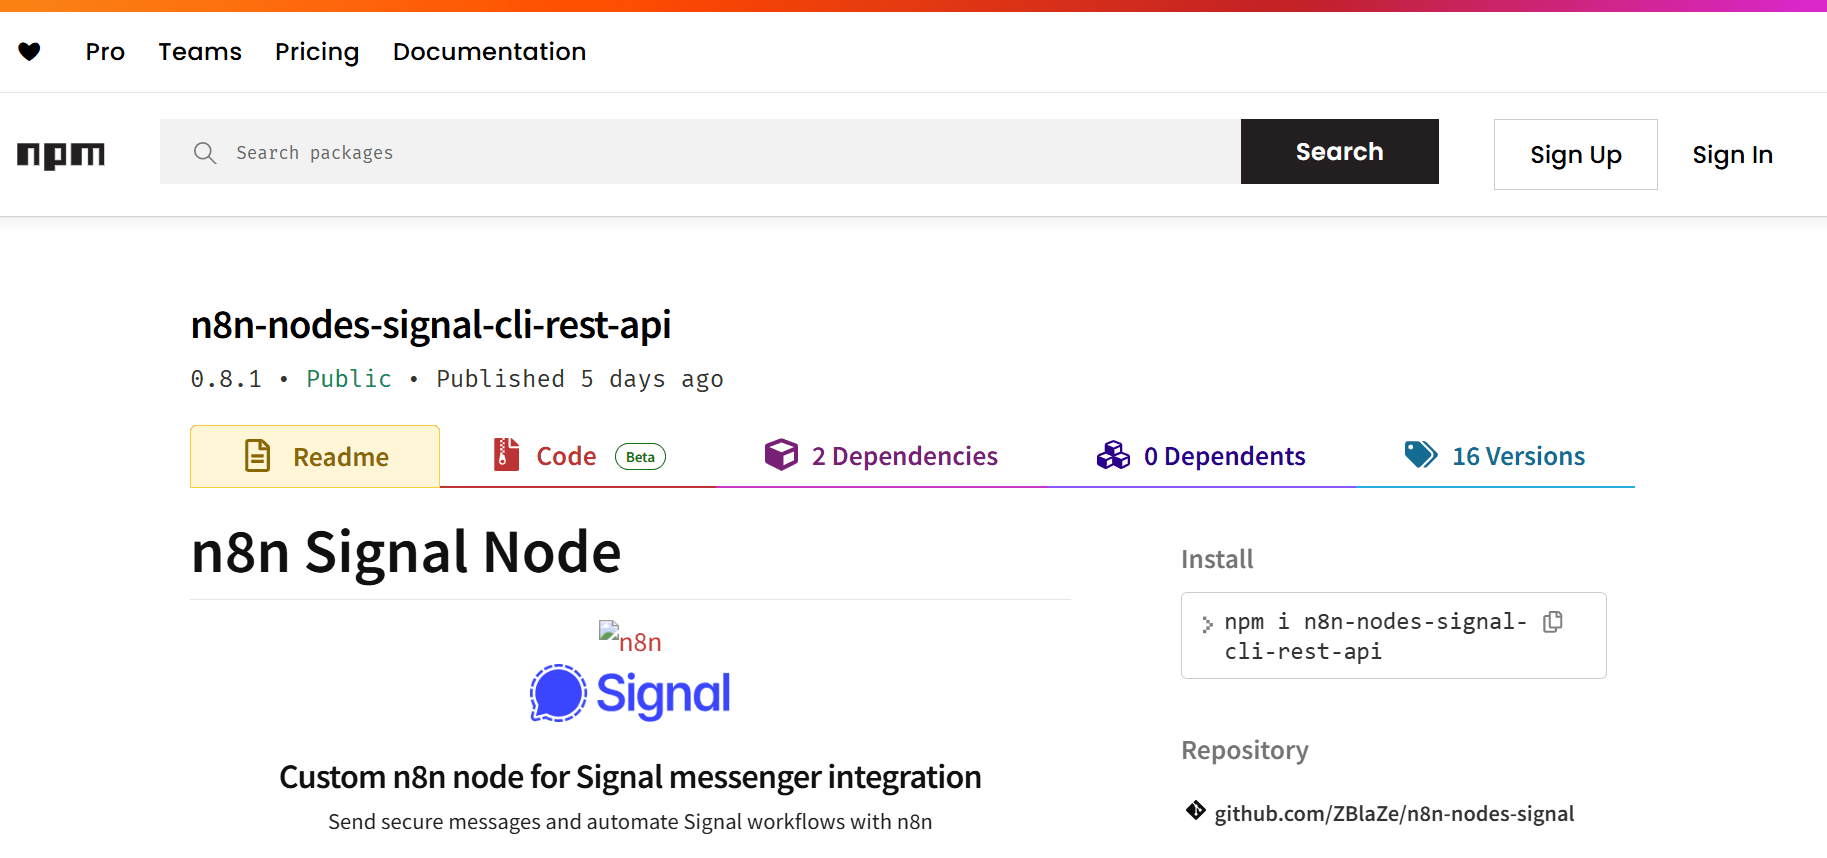
- Navigate to ++your-n8n-server-address/settings/community-nodes++, click the 'Install' button, and paste in the communiy-node package name '++n8n-nodes-signal-cli-rest-api++' to install this community node.
Step 3: Register and Verify Account
- The last step requires a phone-number. You may use your own phone-number, a pre-paid sim card, or (if you are a US resident), a free Google Voice digital phone-number.
-
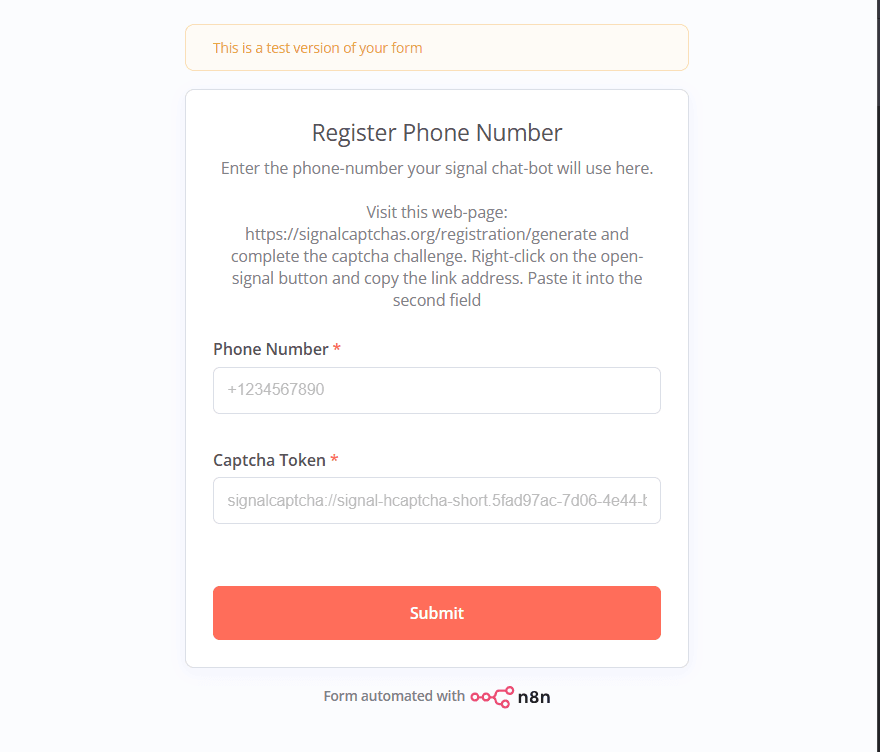
An n8n web-form has been created in this workflow to make headless setup easier. In the Form nodes, replace the URL with the address of your local Signal Rest API endpoint.
-
Open the webform and enter the phone number you are using to register your bot's Signal account
-
Signal needs to verify you are human before registering an account. Visit this page to complete the captcha challenge. The right-click the 'Open Signal' button and copy the link address. Paste this into the second form field and hit 'Submit'.

- At this point you should receive a verification token as an SMS message to the phone-number you are using. Copy this and paste it into the second web-form.
- Your bot's signal account should be setup now. To use this account in n8n, add the Rest-API address and account-number (phone-number) as a new n8n credential.

Step 4: Optional
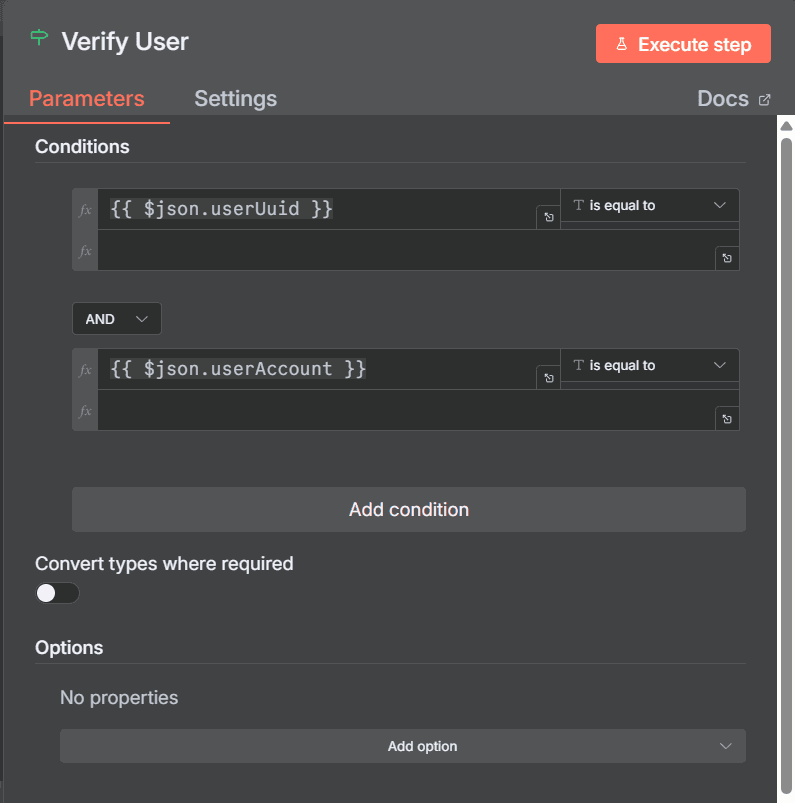
- For extra security it is recommended to restrict communication with this chat-bot. In the 'If' workflow node, enter your own signal account phone-number.
- You may also provide a UUID. This is an identifier number unique to your mobile device. You can find this by sending a test message to your bot's signal account and copying it from the workflow execution data.